Similarities Between Low-end and High-end Technologies
ResourceFolder (Download and unzip it.)
In this tutorial, we will show how low-end and high-end technologies have a lot more in common than you may think. They all:
- Use a form of a template with placeholders or fields (i.e., curly brackets: { }, angle brackets: << >>, or chevrons: ‹‹ ››, etc.)
- Connect to a data source (i.e., database (MS Access, MS SQL Server, MySQL, etc.), XML, Excel, etc.) to populate those placeholders or fields.
| TECHNOLOGY | Microsoft Mail Merge | Adobe SPRY (AJAX) | Server-Side Technologies |
|---|---|---|---|
| TEMPLATE | Form Mail Document | Web Page | Server-side Template |
| DATABASE | MS Excel (Flat DB) MS Access (Relational DB) |
XML (Structure Data) | MS Access (File-based DB) MySQL (Server-based DB) |
Below are typical setups for these technlogies. Keep in mind that other configurations are possible.
| Technology Used |
Data source / Database | Typical Server | Test Page Example (Code added between <body> tags) |
Operating System |
Web Root Directory |
|---|---|---|---|---|---|
| M/S Mail Merge | MS Access / Excel | N/A | N/A | Most | N/A |
| SPRY | XML or HTML Table | N/A | N/A | Most | N/A |
| ColdFusion | Most D/B | CF Server | <cfoutput> Current time: #timeformat(now(), 'hh:mm:ss')# <br /> Current date: #dateformat(now(), 'mm/dd/yyyy')# </cfoutput> |
Most OS | .../wwwroot/ProjectFolder/ |
| PHP | MySQL | Apache | <?php phpinfo() ?> | Most OS | ..../htdocs/ProjectFolder/ |
| ASP/ASP.NET | MS SQL Server | IIS | Windows Only | .../inetpub/wwwroot/ProjectFolder | |
| JSP | Most D/B |
SERVER-SIDE TECHNOLOGIES
While there are five server-side technologies (PHP, ASP. ASP.NET, COLDFUSION and JSP), only three are currently fully supported in Dreamweaver (COLDFUSION, ASP and PHP).
Typically, you use the following steps to create a dynamically database-driven (or data source) web site:
- Create a data source or use an existing data source (in our case, from the ResourceFolder above that you can download)
- Create a connection to the data source
- Create templates that uses database recordset/datasets
- MS MAIL MERGE
- ADOBE SPRY
- Adobe ColdFusion
- PHP
- ASP / ASP.NET
- JSP
Microsoft Mail Merge (Text fields)
First, let's start with the simplest of the technologies and advance to the more complex technologies.
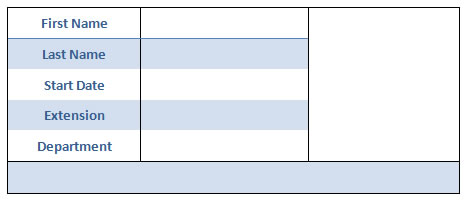
- Create a new blank MS Word document and save it as Employee Directory.
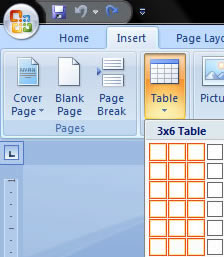
- Insert a 3 X 6 table using the Insert Table menu to draw table:

- Select all except the last cell in the third column and right-click to select Merge Cells from the menu. Select the entire last row and right-click to select Merge Cells again.

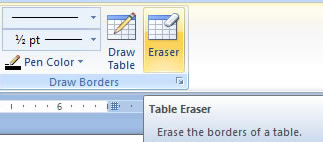
ALTERNATIVELY: You could select the Insert > Table submenu and then select the Draw Table option. Then draw 3 X 6 table and then use the Table Eraser tool and select all except the last cell in the third column to erase them. Likewise, select the entire last row with the Eraser tool selected and erase them:
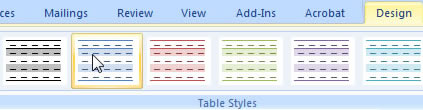
- Select the Design View on the Ribbon and then click inside Table and select a format from the Design tab to format table:
- Select the ENTIRE table first and then click on the border combo box and select All Borders from the list. Click in between the columns and drag to resize the table to something similar to table below:

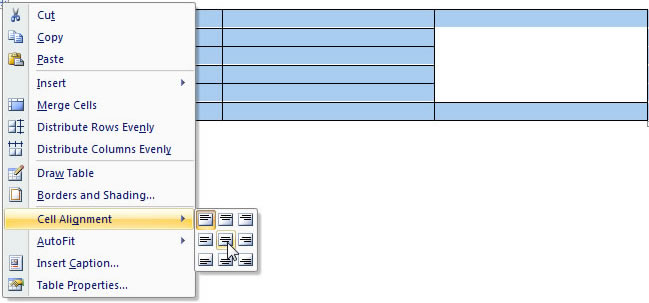
- Select entire table and right-click to select Cell Alignment from the menu and choose middle icon to center all text horizontally and vertically that will be added later:
- Add the following STATIC text to first column:
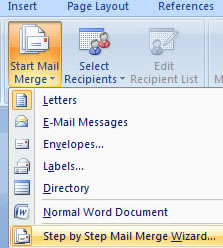
- Select the Mailing tab on the Ribbon and select the Start Mail Merge > Step by Step Mail Merge Wizard... option:
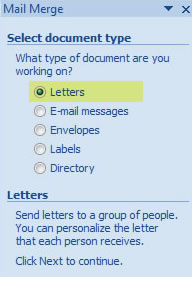
- Select the Letters radio button in the Mail Merge Wizard Step 1 of 6, if not already selected:
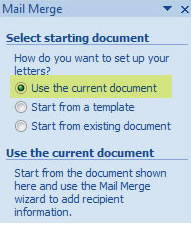
- Click on the Next button link at the bottom of the Mail Merge dialog box (not shown) and select the Use the current document radio button in the Mail Merge Wizard Step 2 of 6:
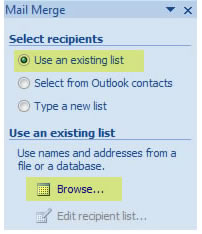
- Click Next button link (not shown) and select Use an existing list radio button in the Mail Wizard Step 3 of 6 and then click on the Browse... link and navigate to the already provided MS Access database (EmployeeDirectory) OR the MS Excel spreadsheet (EmployeeDirectory_Excel_DB) to use one of them as a data source and click Open button. Select the EMPLOYEES_WITH_DEPT_FULL_NAME($) table from the Select Table dialog and click OK to select table. Click OK again to close the Mail Merge Recipients dialog box:
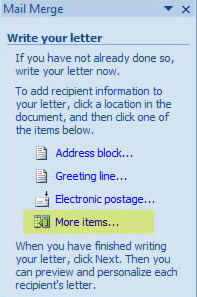
- Insert cursor in first row of second column and in the Mail Merge Wizard Step 4 of 6 click on Next button link (not shown) and select More items... link to open the Insert Merge Field dialog box. Select the FIRST_NAME in the Fields list and click the Insert button and then click Close button to insert the FIRST_NAME placeholder:
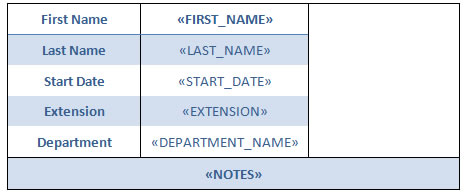
- Repeat previous step for the following placeholder fields in the table below:
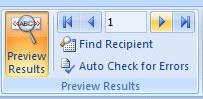
- Click Next: Preview your letters button and then click on Next Record button repeatedly to see placeholder fields replaced by the actually data in the MS Access or the MS Excel data source file.
(Bonus) Microsoft Mail Merge (Image field)
- Adding a dynamic image placeholder takes a little more effort. Place your cursor in the large empty cell and press CTRL+F9 to manually insert a merge field. NOTE: You will see a pair of curly brackets ( { } ) that will allow you to insert code.
TIP: You may want to temporarily resize the last column so that you can see the code better.
CAUTION: You can not copy and paste ALL of the code listed listed in Step 6 below at one time. You have to manually type it or copy the individual statements highlighted in bold one at a time.
{ }
- Insert the following code that is in bold between the curly brackets:
{ INCLUDEPICTURE "" }
- Press CTRL+F9 AGAIN BETWEEN the double quotes to add another set of curly brackets and insert the following code that is in bold:
{ INCLUDEPICTURE "{ IF TRUE "PATH" }" }
- Press CTRL+F9 AGAIN to add another set of curly brackets AFTER the word PATH but BEFORE the double quote and insert the following code that is in bold:
{ INCLUDEPICTURE "{ IF TRUE "PATH{ MERGEFIELD "PHOTO" }" }" }
- AFTER the last double quote, insert the following code that is in bold:
{ INCLUDEPICTURE "{ IF TRUE "PATH{ MERGEFIELD "PHOTO" }" }" \*MERGEFORMAT \d }
- Replace the word PATH with the actual path to the images folder on your computer (Will be different than the one below):
TIP: Naviagate to the folder where the images are and right-click on the Path in the File Explorer and select Copy Address and then paste it into the code below.
{ INCLUDEPICTURE "{ IF TRUE "C:\\Users\\Owner\\Desktop\\Microsoft-Mail Merge and Adobe SPRY\\images\\{ MERGEFIELD "PHOTO" }" }" \*MERGEFORMAT \d }
IMPORTANTE NOTE: Notice, you will need to add double backslash (\\) instead of single backslash to the path to "escape" them.
- Click the Preview Results button if it is not already selected and then click the Next Record button repeatedly to see placeholder fields replaced by the actually data in the MS Access or MS Excel data source file.
TIP: If you prefer, you can use a third-party add-in called OnMerge to write the code for you. Browse to OnMerge.com for details.
(Bonus) Adding a full name below the image
The FIRST_NAME and LAST_NAME fields have be joined together in the MS Access database as a query and as a column in the MS Excel spreadsheet. As a result, you can display both first and last name as a SINGLE field.
- Click to the right of the image and press Enter key to insert a new line.
- Select FULL_NAME from list from the Insert Merge Field on the Ribbon:

- Click Preview Results button if it is not already selected and then click Next Record button repeatedly to see full name placeholder field get replaced by the actually first_name and last_name columns in the MS Access database or the full_name column in the Excel spreadsheet.
SPRY (AJAX)
Spry is Adobe version of AJAX made easy. While there are many things you can do with SPRY (i.e, Form elements, widgets, and effects), we will be using the first category in the Spry tab to create a data set and connect to a data source (in our case, an XML file or an HTML table from another file.).
Before using SPRY(AJAX), Dreamweaver requires you to define a website:
- Create a folder on your desktop (or somewhere else) and give it a name (i.e., SPRY SITE).
- Move the images folder from the ResourceFolders that you download earlier to this folder.
- Select Site > New Site... from the menu.
- In the Site Setup dialog box that appears, give the site a name (i.e., SPRY SITE) and click the Browse button and navigate to the folder that you created earlier (i.e., SPRY SITE).
- Click the Save button to close the dialog box and define the site in Dreamweaver.
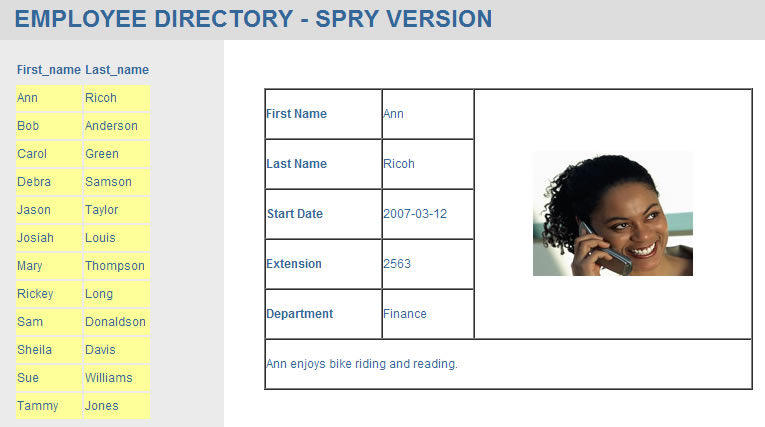
The Spry HTML data set allow you to use an HTML table or another HTML structure as its datab source. However, using a table is only recommended for relatively small amount of data; otherwise, performance will be affected.
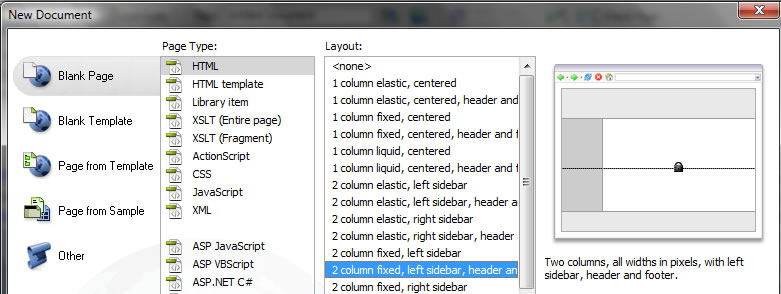
- Create a new 2 Column Fixed-Width Layout HTML page and replace the text Header in the #header div with EMPLOYEE DIRECTORY - SPRY VERSION:
- (Bonus) Attach the already provided style sheet (main.css) to the page.
- Insert cursor anywhere inside the #sidebar1 div and press CTRL+A to select all of the text and then press Delete button to delete it.

- While the cursor is still inside the #sidebar1 div, select Spry tab from the Insert Object Bar and click Spry Data Set icon

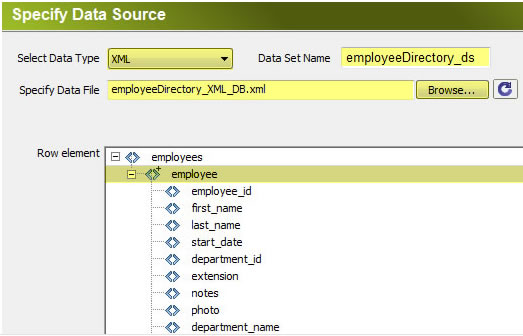
- In the Spry Data Set dialog box (Specify Data Source) - Step 1 of 3:
- Select XML as the Data Type
- Name Data set EmployeesDirectory_ds
- Click Browser button and navigate to the XML file named employeeDirectory_XML_DB.xml and click OK
- Select Row element with the small plus (+) sign in front of it.
NOTE: This represent a repeating node in the XML file. - Click Next button (not shown)
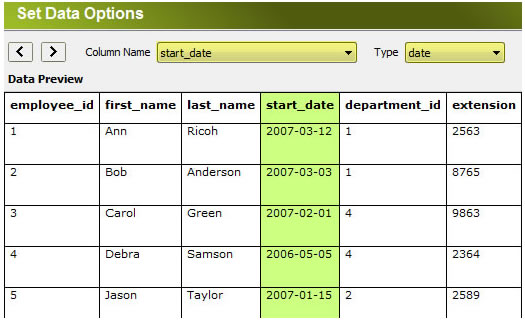
- In the Spry Data Set dialog box (Set Data Options) - Step 2 of 3:
- Click on start_date field to select the whole column (or select it from the Column Name combo box) and then select date in the drop-down box as the Type to set the field as a data field and not a string field.
- Click Next button (not shown)
- Click on start_date field to select the whole column (or select it from the Column Name combo box) and then select date in the drop-down box as the Type to set the field as a data field and not a string field.
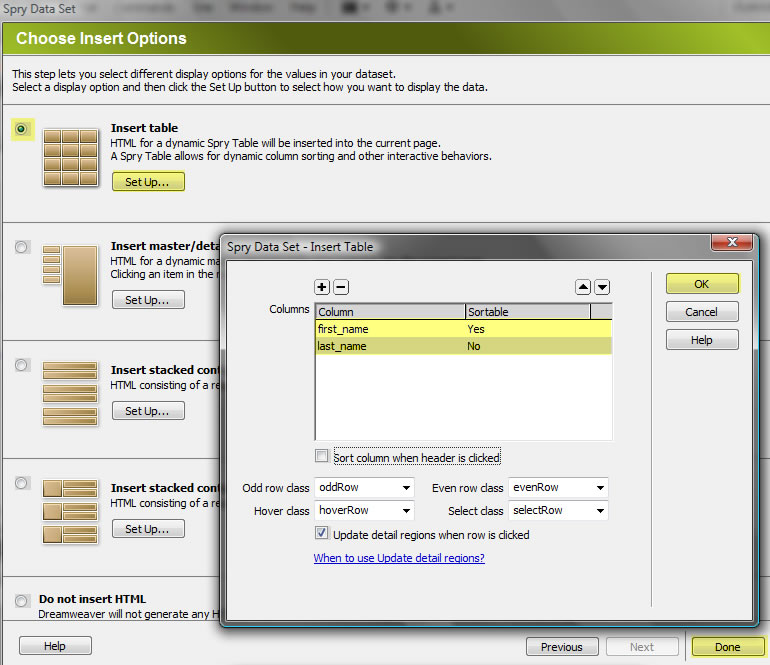
- In the Spry Data Set dialog box (Choose Insert Options) - Step 3 of 3:
- Click on Insert Table radio button
- Click on Set Up... button and click on the minus sign (-) to delete all columns except the first_name and last_name in the dialog that appears
- Deselect Sort column when header is clicked checkbox
- Select Update detail region when row is clicked checkbox
- Select correspondent classes for each class field (i.e., evenRow, oddRow, hoverRow, selectRow) if you attach a main.css style sheet.
- Click OK to close the Spry Data - Insert Table dialog box.
- Click Done (not shown) to close Spry Data Set dialog box.
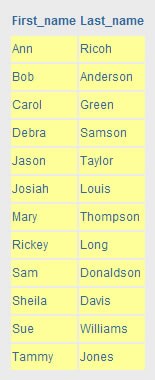
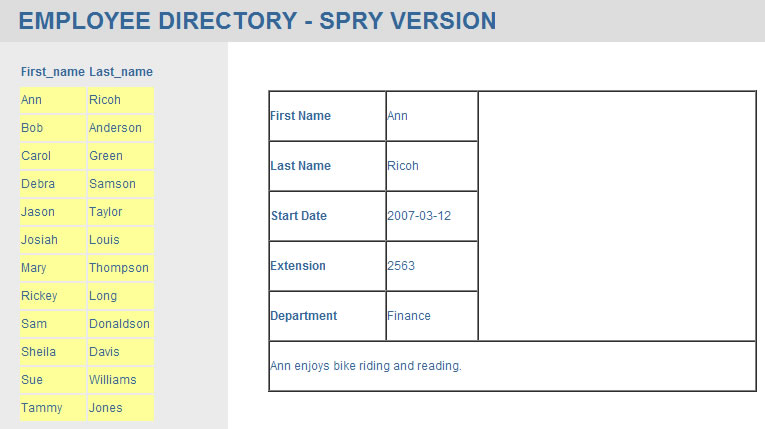
- Notice the placeholders that were added to the dynamic table. To see the actual data from the XML file, click on the Live view button or preview page in a browser (F12).
- Click anywhere inside #content div and press CTRL+A to select all of the text and then press Delete key to delete it. Immediately, press Enter key so you can "see" the #content div.
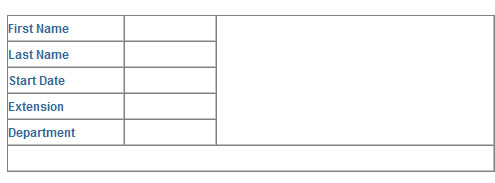
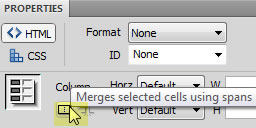
- Create a table 3 columns x 6 rows table and and merge the first five cells in the third column and merge all cells in the last row by selecting the cells first and the selecting Table > Merge Cells for each and add the following static text:
TIP: You can also click the Merge Cell icon in the Property Panel:

TIP: To save time and maintain a similar format with the Microsoft Mail Merge Example table, while the cursor is still in the #container div, copy the table from the Microsoft Word document and delete only what were the dynamic fields:
- Click inside of table and then select <table> tag with tag selector:

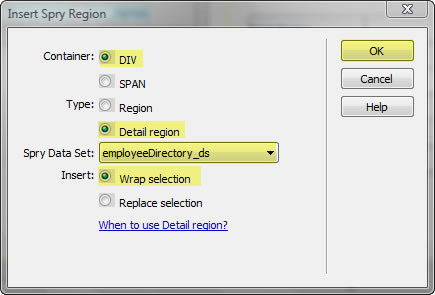
- Click on Spry tab in Option Tool Bar and click on Spry Region icon to open its dialog box and select:
- Container: DIV
- Type: Detail region
- Spry Data Set: employeeDirectory_ds (If there is only one data set, it will already be selected.)
- Insert: Wrap Selection
- Click OK

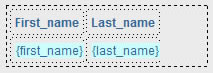
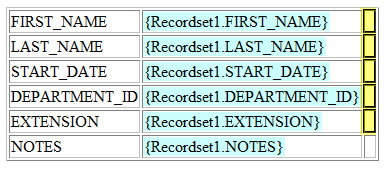
- Type in Static text and drag and drop placeholders from the Bindings panel (Window > Bindings) to their corresponding cells in the table (See below):
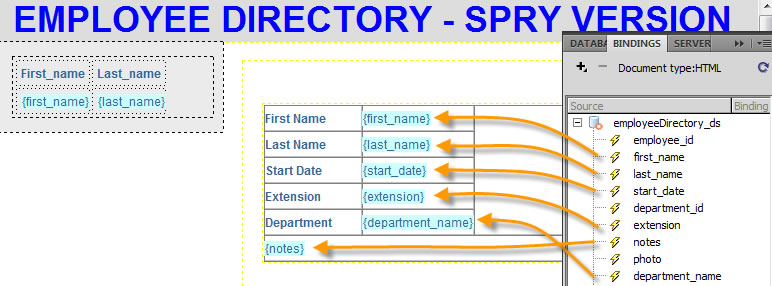
- Notice the placeholders. If you click Live view button or preview the page in a browser, you will see the placeholders fields replaced with the first set of data from the XML file. You can also click on any cell in the table in the #sidebar div and see the table in the #container div gets updated with a new "record."
NOTE: Don't drag and drop the photo placeholder. We will do it in the next step.
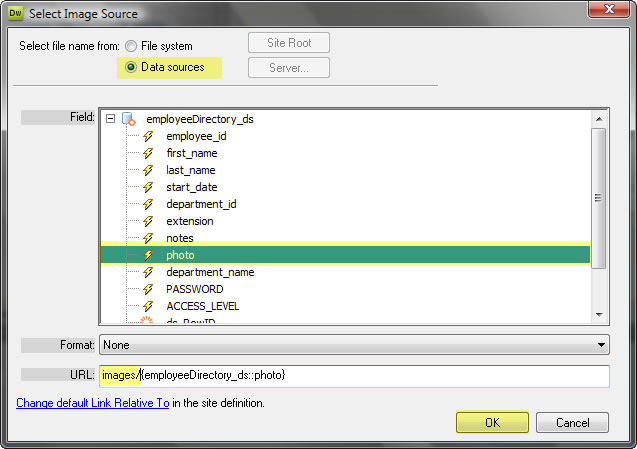
- Click inside the large empty table cell and select Insert > Image from menu and select the Data Source radio button in the Select Image Source dialog box. Click on photo placeholder and then click to the immediately left of the first curly bracket and TYPE the following text that is in bold in the URL field at the bottom of the dialog box:(i.e., images/{employeeDirectory_ds::photo} ). Then click OK.
NOTE: Notice there is a forward slash ( / ) after the word images.
NOTE: The path is a combination of static text (images/) and dynamic data ({emplyeeDirectory_ds::photo}).
- (Bonus) If you are prompted to input a text for the Image Tag Accessibility Attributes dialog box, you can also add a placeholder in that field. For example, if you wanted to add an <alt> tag that would display the first and last names of the person in the image, you could write the following dynamic placeholder in the Alternate text field: {first_name} {last_name} or any other column(s) in the database that you would like to display.
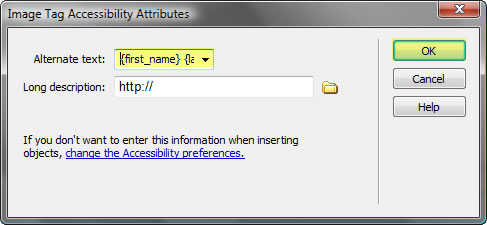
ALTERNATIVELY: You could also add the same dynamic placeholder in the Alt field in the Properties Panel:

- If you click the Live view or preview the page in a browser, you will see the image placeholder field is replaced with the actual image and not the literal image name. You can also click any other cell in the #sidebar div and notice the images will be updated.
(Bonus) Add Employee X of X
Dreamweaver provide some additiona dynamic data from the data set you created tha you can take advantage of in your project. For example, dsRowID and dsRecordCount is useful. However, the dsRecordCount start counting from zero. To avoid this problem, you an use some additiona variables that is included in the SpryData.js file.
- Type "Employee X of X" at the bottom of the table.
- Replace the first X with the dsRowID dynamic data from the Binding binding by draggng and dropping it to replace the first X.
- Replace the second X with the dsRecordCount from the Binding paneel by dragging and dropping it to replace the second X.
- Select Split view and then select the dsRowID in the Design view. Then in the Code view change the dsRowID to dsRowCountPlus1.
- Test page.
(Bonus) Convert the table to a combo box.
- Click inside of table and then select <table> tag in tag selector and press Delete key to delete table.
- Add the following code inside the following div tag:
<div spry:region="employeeDirectory_ds">
NOTE: Dreamweaver deleted the dataset when the table was deleted so it needs to be added back.
- Add the following code inside the same <div> tag to replace the table with a combo box.
<div spry:region="employeeDirectory_ds">
<select name="select" spry:repeatchildren="employeeDirectory_ds">
<option spry:setrow="employeeDirectory_ds" value="{first_name}">{first_name} {last_nme}</option>
</select>
</div>
NOTE: The spry:repeatchildren="employeeDirectory_ds" will repeat the children tags—the <option> tag. The spry:setrow="employeeDirectory_ds" will set the row in the database based on the combo box selection.
- If you preview the page in a browser, you will see that the table has been replaced by a combo box. You can now select a name from the combo box and see the detail region gets updated. NOTE: The page does not work with Live View.
(Bonus) Format the table
- Add the following CSS code between the <style> tags in the <head> tags to style the table:
<style>
...
#mainContent div table tr td { text-indent: 10px; line-height:1; padding-top: 0px; padding-left: 0px;}
#mainContent div table {border: 1px solid black;}
tr.custom_row { background: #9CF; }
...
</style> - Apply the tr.custom_row class to the even rows <tr> tags of the table by selecting the <tr> tag in the tag selector and selecting Set Class > custom_row.
COLDFUSION
ColdFusion (built on Java) is the easiest server-side technology to learn because it is tag-based. (So, I often say that if you know (X)HTML, you can learn CF in a Flash--no pun intended). Many of the functionality that requires many lines of code in other server-side technologies, requires only a few lines in CF. It also benefits from close integration with other Adobe technologies, etc.:
- generate PDF dynamically
- generate Flash-based forms
- manipulate images
- communicate with most relational database
There are three favors of ColdFusion:
- Standard Edition (about $1300)
- Enterprise Edition (about $7500)
- Developer Edition (free)
The Developer Edition includes all of the functionality of the Enterprise Edition but is limited access from two other computers. To deploy your application you need a Standard or Enterprise Edition. However, most hosting companies offer ColdFusion at a nominal cost ($16/month). ColdFusion runs on most Operating Systems.
- Install the Developer Edition of the ColdFusion server on your computer. (Go to http://labs.adobe.com/technologies/coldfusion9/ to download)
- While installing Coldfusion accept most of the default options except:
- Select the Developer Edition
- Built-in web server
- Password (i.e., admin)
- RDS password (i.e., admin)
- DO NOT LAUNCH the Configuration Wizard or ColdFusion Admin page yet.
- Create a folder named Employee Directory at the ColdFusion server root level (C:\ColdFusion9\wwwroot\) and move a copy of the MS Access database ( EmployeeDirectory.mdb ) to it. Also, move the images folder that have pictures in them as well.
- Now, launch the CF Admin page ( http://localhost:8500/CFIDE/administrator/) by giving it a user name/password and clicking the Login button.
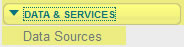
TIP: It is best to bookmark the CF Admin page because you will need to access it from time to time. - Select DATA & SERVICES button in the left panel and then click on the Data Sources link below the button and enter the following information:
- Data Source name: employee_directory
- Driver: Microsoft Access
- Then click Add Button

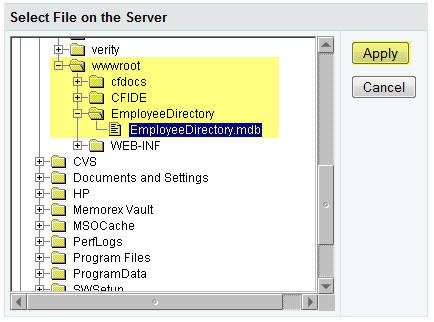
- Click Browser Server button next to the Database File text field in the dialog box the appears and navigate to the MS database file (i.e., EmployeeDirectory.mdb) in the Select File on the Server dialog box to select it and press Apply to set the Database File:
- Accept other default values and click Submit button

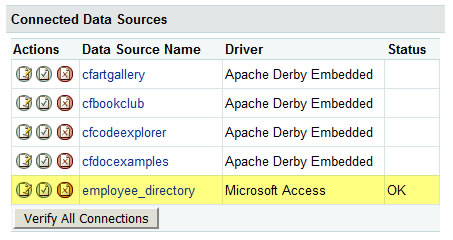
NOTE: You should see a statement at the top of the same dialog box that states "data source updated successfully." Also, you should see that the Status file is set to OK for that data source:
ALTERNATIVE: You can connect to a MySQL database using the same set of steps except you would select a MySQL Driver (i.e., MySQL 3/4) and give the data source a unique name (i.e., EmployeeDirectory_mysql).
- Close the ColdFusion Admin page.
- Define a ColdFusion web site:
- Select Site > New Site... from the menu or click on the New Site icon.
- In the Advanced tab, choose the Local Info category and enter the following info:
- Site name: EmployeeDirectory_CF
- Local root folder: {webroot}\EmployeeDirectory
NOTE: Replace {webroot} with the path to the root level of the ColdFusion Server (i.e., C:\ColdFusion9\wwwroot) - HTTP address: http://localhost/EmployeeDirectory
- Select the Testing Server category and enter the following info:
- Server model: ColdFusion
- Access: Local/Network
- Testing server folder: {webroot}\EmployeeDirectory
NOTE: Replace {webroot} with path to the root level of the ColdFusion Server (i.e., C:\ColdFusion9\wwwroot) - URL Prefix: http://localhost:8500/EmployeeDirectory.
NOTE: It is important to add the port number 8500 to the path. - Click OK and then click Done
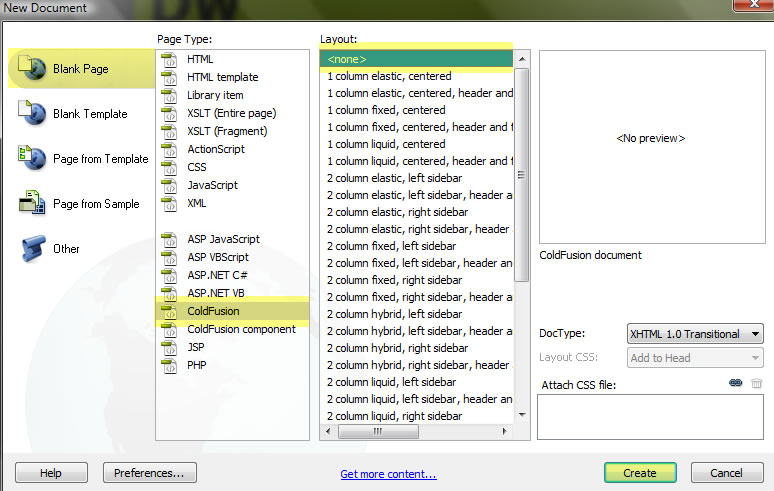
- (Optional) Create a blank (Layout set to None) ColdFusion page (not HTML) and save it as Application.cfm and then set a variable between the <body> tags (<cfset ED_dsn = "employee_directory">). Add a title named Employee Directory Application.
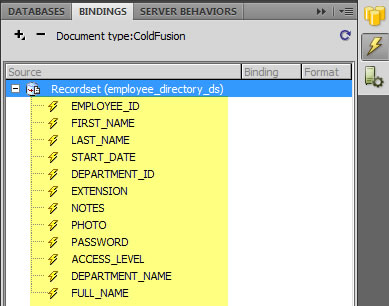
- Then in the BINDINGS panel, click on the Add (+) button and select Data Source Name Variable from the list and enter "ED_dsn" in the Variable Name field and then select the desired data source ("employee_directory") from the Data Source List and then click OK. You should see the variable list in the BINDING panel.
NOTE: Creating an Application.cfm file and setting data source variable will allow the variable to be included in every CF page within the site regardless of where it is located. Once the variable is set in the Application.cfm file, any document created can now have a reference to the variable (cfquery name = "employee_directory" datasource="#ED_dsn#") instead of the actually data source (employee_directory). The advantage of this approach is that it makes the application more modular and easier to update all references to the database for one location instead of all of the CF files that reference that database source. So as an alternative in the steps below, you can select the #ED_dsn# instead of employee_directory as the datasource.
- Create two blank ColdFusion pages. (Do not create HTML pages). Name the first employee_master.cfm and the second employee_detail.cfm:
- Give the employee_master.cfm a a title of EMPLOYEE MASTER PAGE and give the employee_detail.cfm a title of EMPLOYEE_DETAIL PAGE and then save both.
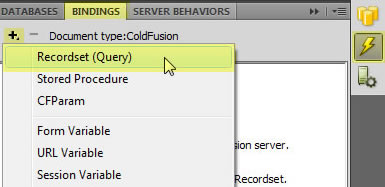
- Return to employee_master.cfm and create a Recordset (Query) by clicking on the plus sign (+) in the BINDINGS Panel:
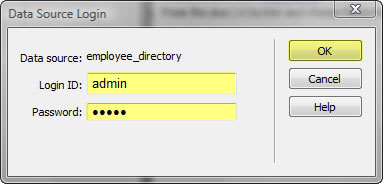
- If prompted, enter password and press OK:
- In the Recordset dialog box, change the following highlighted fields. Click Test button to "see" the records in the database. Then, click OK to accept changes.
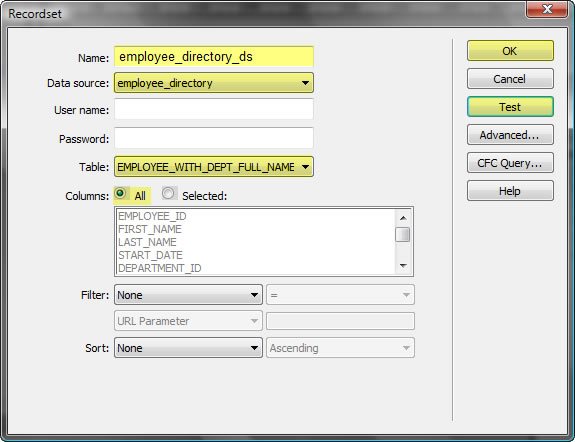
NOTE: The following code was added above the <html> tag because it is not part of the page. It basically says, "Create a record - set called employee_directory_ds" and select all of the columns in the "employee_directory" database from a table called EMPLOYEE_WITH_DEPT_FULL_NAME."

NOTE: The following recordset dynamic placeholders fields were added to the BINDINGS Panel as a result of the above query:
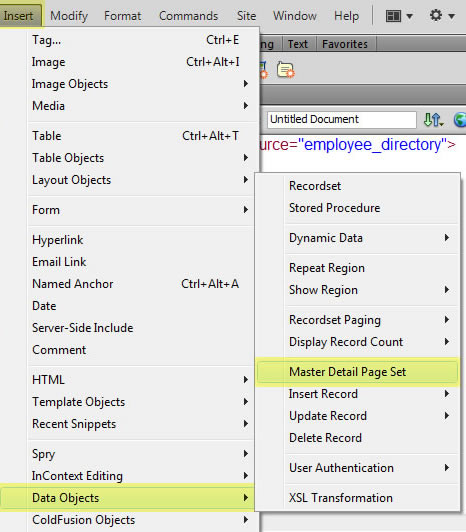
- Click in Design view to insert the cursor. Then select Insert > DatabObjects > Master Detail Page Set
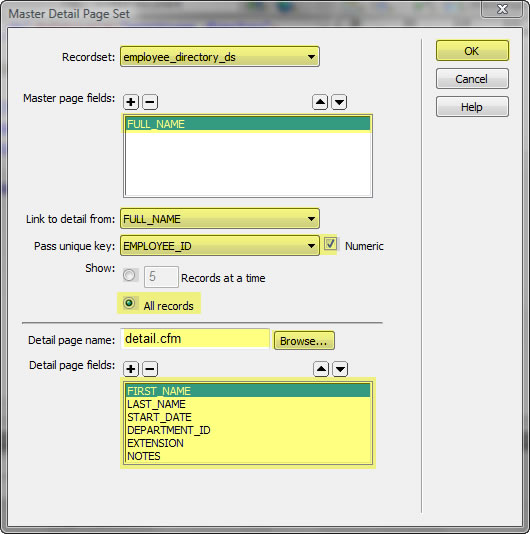
- In the Master Detail Page Set dialog box, add, delete or edit the following fields and then click OK:
SCREENSHOT CORRECTION: The screenshot says detail.cfm instead of employee_detail.cfm.
NOTE: Dreamweaver adds a dynamic table to the employee_master.cfm AND the employee_detail.cfm page.
- Click File > Save All to save both pages.
- Preview the employee_master page in a browser. Click a name to see the employee_detail page. Click browser's back button to go back to the employee_master page and click on another link to see the employee_detail page change again.
- (Optional) While both pages work when previewed in a browser, Dreamweaver retrieves all of the records for both pages (SELECT *). To make the pages more optimized, change the SELECT statements to match only what colomns (fields) that are needed:
- master page: SELECT EMPLOYEE_ID, FIRST_NAME, LAST_NAME
- detail.cfm page: SELECT FIRST_NAME , LAST_NAME, START_DATE, DEPARTMENT_ID, EXTENSION, NOTES, PHOTO
NOTE: Notice that PHOTO is included but will be used later.
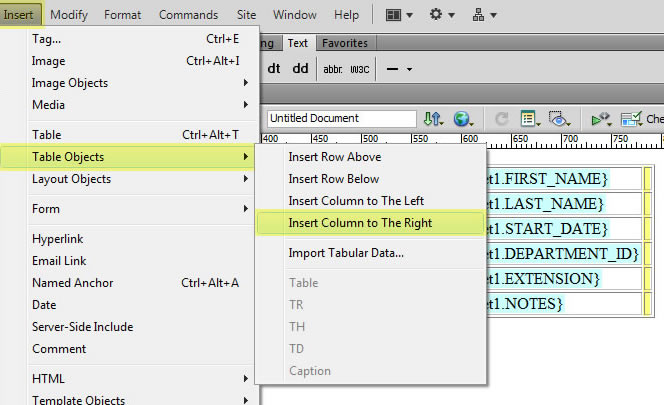
- Click employee_detail page tab and add a column to the table by right-clicking anywhere in the last column and select Insert > Table Objects > Insert Column to The Right.
- Select all cells in the newly created column except the last cell and click Merge Cell icon in the Property panel. Alternative, right-click in cells and then select Table > Merge Cells (CTRL+ALT+M).
- Delete the static text NOTES and then select the entire last row and merge its cells too.
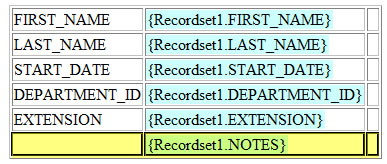
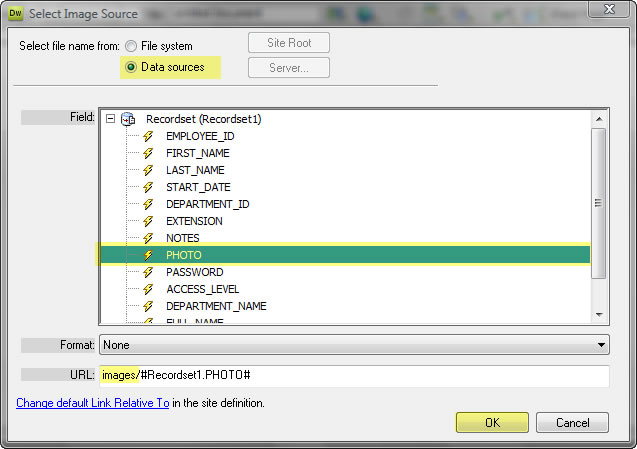
- Click Insert Image and select the Data sources radio button and select the PHOTO Field. Then add the text images/ to the beginning of the URL path at the bottom of the panel. Click OK.
- Preview the employee_master page in a browser. Click a name to see the employee_detail page. Click browser's back button to go back to the employee_master page and click on another link to see the employee_detail page change again. You should see images instead of image string literals.
(Bonus) Format the table
- In the employee_detail.cfm, add the following CSS code before the </head> tags to style the table:
<style>
tr { text-indent: 10px; line-height:1; padding-top: 0px; padding-left: 0px;}
table {border: 1px solid black;}
tr.custom_row { background: #9CF; }
</style>
- Apply the tr.custom_row class to the even rows <tr> tags of the table by selecting the <tr> tag in the tag selector and selecting Set Class > custom_row.
- Select table with the tab chooser and in the Property Panel delete the 1 in the Border text field.
- Save employee_detail.cfm page and then switch back to the employee_master.cfm and test page in browser as before.
PHP – PHP Hypertext Prepressor
PHP is an open-source server-side technology and was created as an alternative to Perl. PHP can run on most relational database but is typically used with MySQL--an open source database. Currently, Dreamweaver only support creating PHP sites with MySQL. PHP can also run on any platform using almost any web server. However, it is typically used with the Apache server--an open-source server. In fact, you can download the complete package of open-source software called XAMPP, that support the four most common operating system (Windows, Mac, Linux, Solaris) and include support for Apache, MySQL, PHP and Perl. Like CF which uses .../wwwroot as the web root folder, PHP can not normally access any files OUTSIDE of its web root-- .../htdocs. So you normally create project folder at this level (i.e., .../htdocs/myProject/index.php).
Creating a PHP version of the Employee Directory is almost the same as the ColdFusion vesion with a few exceptions. Mainly, you will select:
- A PHP server instead of ColdFusion server
- A PHP site definition instead of a ColdFusion site definition
- A MySQL database instead of a MS Access database
- Use Dreamweaver to create connection instead of ColdFusion Admin page
- Install the latest version of the Apache server, MySQL database and PHP onto your computer.
TIP: You can download the Open Source XAMPP for Windows to your desktop to install Apache, MySQL and PHP, etc. all at one time. (Go to http://www.apachefriends.org/en/xampp.html to download)
NOTE: Apache comes pre-installed on the Mac OS; however, it is not enabled by default. PHP also comes pre-installed on the Mac OS.
History: Apache is derived from a play on word. It was created from patching together other components, so it was originally "A Patchy Server." - While installing XAMPP for Windows select the C:/ path to install all of the files to it.
- (Optional) Reboot your system to ensure all services work correctly.
- Click on the XAMPP Control Panel that was installed or go to C:/xampp/xampp-control to open it.
- Ensure that the Apache and MySQL services are running, if not turn them on.
- Click on the Admin button for the MySQL server to open phpMyAdmin screen.
- Create a database (EmployeeDirectory)
- Create a table for that database (Employees) using the same fields as you used for Coldfusion, XML or Word examples
- Populate database with the same data or import the data from the EmployeeDirectory.mdb file or the XML file.
TIP: You could convert the Microsoft Access database to a mySQL database by using a convert tool like the Bullzip MS Access to MySQL conversion utility (msa2mys_3_0_0_148).- Double click the MS Access to MySQL app to open it
- Click Yes if a prompt states that it was unable to find a MySQL ODBC driver on this computer....
- Click Next in the information dialog box that has to steps needed.
- In the Source Database dialog box that appears, click the Browser button (with ....) and navigate the the Microsoft database (i.e., .../employee_directory.mbd) and then click the Next button.
- In the Destination Database dialog box that appears, click the Browwer button (with ....) and navigate or type where you want the destination database to be save (the default name is dump.sql). Then type a database name in the Database text field (i.e., employee_directory_php) and then click the Next button.
- In the Select Table dialog box that appears select the table you need (i.e., employees) and then click the Next button.
- In the Transfer option dialog box that appears click the Run Now button.
- Open the phpMyAdmin (i.e., http://localhost/phpmyadmin/) and create a new database (i.e, employee_directory_php) and then click on the Import button and navigate the the sql file (i.e., dump.sql).
- Add a user for the database to give him/her privledge to Insert/Update and Delete records with a user name (i.e., Cornelius Chopin) and a password (i.e., mysql).
- Create a folder named Employee Directory_PHP at the PHP server root level (C:\xampp\htdocs\). Move the images folder that have pictures in them as well.
NOTE: All PHP applications should go in the htdocs folder unless a virtual folder is created (Action Item) - (Optional) Create a PHP test page to see if PHP is working correctly:
- Create a new blank PHP page and replace all of the existing code in Code view with <?php phpinfo(); ?> and then save it as phptest.php in the PHP web root project folder (i.e., .../htdocs/Employee Directory_PHP/phptest.php). NOTE: If you are using IIS, you will have to navigate to the .../inetpub/wwwroot folder.
NOTE: The opening "<?php" and closing "?>" tells the web server to send this information to the application server for processing. Any other tags are treated as standand (X)HTML code. - Open a browser and test the file (i.e., http://localhost/EmployeeDirectory_PHP/phptest.php) or click on the Live View button if you have a CS3 or higher version of Dreamweaver.
- Create a new blank PHP page and replace all of the existing code in Code view with <?php phpinfo(); ?> and then save it as phptest.php in the PHP web root project folder (i.e., .../htdocs/Employee Directory_PHP/phptest.php). NOTE: If you are using IIS, you will have to navigate to the .../inetpub/wwwroot folder.
- Define a PHP web site:
- Select Site > New Site... from the menu or click on the New Site icon.
- In the Advanced tab, choose the Local Info category and enter the following info:
- Site name: EmployeeDirectory_PHP
- Local root folder: {webroot}\EmployeeDirectory
NOTE: Replace {webroot} with the path to the root level of the PHP Server (i.e., C:\xampp\htdocs\EmployeeDirectory_PHP) - HTTP address: http://localhost/EmployeeDirectory_PHP
- Select the Testing Server category and enter the following info:
- Server model: PHP MySQL
- Access: Local/Network
- Testing server folder: {htdocs}\EmployeeDirectory_PHP
NOTE: Replace {htdocs} with path to the root level of the PHP Server (i.e., C:\xampp\htdocs\) - URL Prefix: http://localhost/EmployeeDirectory_PHP.
- Click OK and then click Done
- Using the DATABASES Panel, ensure that all of the options are checked:
To use dynamic data on this page:
- Create a site for this file (Should already have a check mark next to it)
- Choose a document type. -- Select this link and enter PHP as the testing server and then click OK. (A checkmark should appear next to it.)
ALTERNATIVE: You could have create a new PHP page by selecting File > New... and the select Blank Page, PHP and <none> from the three columns and this click the Create button to create a PHP page. - Set up the site's testing server (if necessary). -- Select this link and enter the following values:
- Server model: PHP MySQL
- Access: Local/Network
- Testing server folder: C:\xampp\htdocs\EmployeeDirectory_PHP or whatever directory you created the folder.
- URL Prefix: http://localhost/EmployeeDirectory_PHP
NOTE: Notice the slash is backward slash ( \ ) for a file reference and a forward slash ( / ) for URL reference.
ALTERNATIVE: You could have filled out this information when you were defining the site.
- Create a Connection by clicking on (+) button above: -- Click on the (+) icon and select MySQL Connection to create a connection to the MySQL database that was created ealier and enter the following values:
- Connect name:employee_directory
- MySQL Server: localhost
- User Name: Enter your user name (i.e., Cornelius Chopin) that you created when you set up the database.
- Password: Enter your password (i.e., mysql) that you created when you set up the database.
- Database: Click on the Select button and select the database that you created ealier (i.e., employee_directory)
- Click OK to close the Select Database dialog box and then click OK again to close the Connection dialog box.
- (Optional) Expand the Tables in the DATABASES panel and right click and select View Data.... on the employees table. View data from database and then click OK to close it.
- Create two blank PHP pages. (Do not create HTML pages). Name the first employee_master.php and the second employee_detail.php:
(CHANGE SNAPSHOT TO SHOW PHP INSTEAD OF COLDFUSION)
- Return to employee_master.php and create a Recordset (Query) by clicking on the plus sign (+) in the BINDINGS Panel:
(CHANGE SNAPSHOT TO SHOW PHP INSTEAD OF COLDFUSION)
- In the Recordset dialog box, change the following highlighted fields. Click Test button to "see" the records in the database. Then, click OK to accept changes.
(CHANGE SNAPSHOT TO SHOW PHP INSTEAD OF COLDFUSION)
NOTE: The following code was added above the <html> tag because it is not part of the page. It basically says, "Create a record set called employee_directory_ds" and select all of the columns in the "employee_directory" database from a table called employees."
(CHANGE SNAPSHOT TO SHOW PHP INSTEAD OF COLDFUSION)
NOTE: The following code was add BELOW the </html> tag.
(CHANGE SNAPSHOT TO SHOW PHP INSTEAD OF COLDFUSION)
NOTE: The following recordset dynamic placeholders fields were added to the Bindings Panel as a result of the above query:
(CHANGE SNAPSHOT TO SHOW PHP INSTEAD OF COLDFUSION)
- Click in Design view to insert the cursor. Then select Insert > DatabObjects > Master Detail Page Set
(CHANGE SNAPSHOT TO SHOW PHP INSTEAD OF COLDFUSION)
- In the Master Detail Page Set dialog box, add, delete or edit the following fields and then click OK:
(CHANGE SNAPSHOT TO SHOW PHP INSTEAD OF COLDFUSION)
NOTE: Dreamweaver adds a dynamic table to the employee_master.cfm AND the employee_detail.cfm page.
- Click File > Save All to save both pages.
- Preview the employee_master page in a browser. Click a name to see the employee_detail page. Click browser's back button to go back to the employee_master page and click on another link to see the employee_detail page change again.
- Click employee_detail page tab and add a column to the table by right-clicking anywhere in the last column and select Insert > Table Objects > Insert Column to The Right.
(CHANGE SNAPSHOT TO SHOW PHP INSTEAD OF COLDFUSION)
- Select all cells in the newly created column except the last cell and click Merge Cell icon in the Property panel.
(CHANGE SNAPSHOT TO SHOW PHP INSTEAD OF COLDFUSION)
- Delete the static text NOTES and then select the entire last row and merge its cells too.
(CHANGE SNAPSHOT TO SHOW PHP INSTEAD OF COLDFUSION)
- Click Insert Image and select the Data sources radio button and select the PHOTO Field. Then add the text images/ to the beginning of the URL path at the bottom of the panel. Click OK.
(CHANGE SNAPSHOT TO SHOW PHP INSTEAD OF COLDFUSION)
- Preview the employee_master page in a browser. Click a name to see the employee_detail page. Click browser's back button to go back to the employee_master page and click on another link to see the employee_detail page change again. You should see images instead of image string literals.
(Bonus) Format the table
- In the employee_detail.php, add the following CSS code before the </head> tags to style the table:
<style>
tr { text-indent: 10px; line-height:1; padding-top: 0px; padding-left: 0px;}
table {border: 1px solid black;}
tr.custom_row { background: #9CF; }
</style>
- Apply the tr.custom_row class to the even rows <tr> tags of the table by selecting the <tr> tag in the tag selector and selecting Set Class > custom_row.
- Select table with the tab chooser and in the Property Panel delete the 1 in the Border text field.
- Save employee_detail.php page and then switch back to the employee_master.php and test page in browser as before.
ASP – Active Server Pages
There are two favors of ASP: ASP Classic, the older version and ASP.NET, the newer standard. ASP is bundled with Microsoft Web Server -- Internet Information Services (IIS). IIS comes preinstalled with Window servers and can only run on the Windows OS.
ASP can be written in JScript (MS version of JavaScript) or the more popular way is to use VBScript (Visual Basic Script). Like CF, ASP can run on most database but it typically used with Microsoft SQL Server. It works mainly in the Window environment.
- In the Control Panel, click on the Programs and Features and then click on the Turn Windows Features on or off in the sidebar.
- Click the checkbox next to the Internet Information Services in the Window Features dialog box and then click OK to set up IIS as a Window component.
- IF THE APACHE SERVER IS CURRENTLY RUNNING: In the Control Panel, click on the Administrative Tools and then double-click on Services and select the Apache Services and click on the stop link in the sidebar. Click the dialog box.
IMPORTANT NOTE: While you can install both the Apache and IIS server together, you should NOT attempt to run the Apache server at the same time as the IIS server. Turn one off as needed. - Back in the Control Panel Administrative panel, double-click on Internet Internet Information Services (IIS) Manager and then click on the link in the left sidebar to expand the options. Select Sites and then Default Sites and then in the right sidebar under Manage Sites and click Start.
- To test to see if the IIS server is working correctly, type localhost in a browser. You should see the ISS home page.
NOTE: Like CF (i.e., ColdFusion9/wwwroot) and PHP (.../htdocs/), the default location for the IIS home page is: inetpub/wwwroot/iisstart.htm. Hence, this is the IISn default web root directory.
Create a DSN
CAUTION: Currently, Microsoft does not have a 64 bit ODBC drivers. However, you can still use the 32 bit ODBC drivers to create the DSN by DIRECTLY launching the 32 bit Data Source administrator that is located at: c:\windows\sysWOW64\odbcad32.exe or you can download the drivers at: http://www.microsoft.com/downloads/details.aspx?familyid=7554F536-8C28-4598-9B72-EF94E038C891&displaylang=e
- In the Control Panel, select Administrative Tools and double-click the DataSources (ODBC) option.
JSP – Java Server Pages
JSP ....