Working with Foreground and Background Images
Images are the hallmark of many web sites. There are a multitude of ways to work with images.
Foreground images
Foreground images (also called inline images) uses the HTML <img> tag to embedded images in a page. The tag itself is a single self-closing tag and uses the following HTML syntax:
<img src="girl_with_laptop.jpg" width="150" height="246" alt="girl with a laptop" />
NOTE: While optional, it is highly recommended that you set the width and height properties so that the browser does not have an unnecessary delay displaying the page because it has to calculate the dimension. It is also important to add "alt" tags for accessibility.
Problem: Changing size of image does not change file size
It is important to note that when you insert an image in Dreamweaver, it will be inserted at its "original" size. Beginner developers and designers will insert a large image and scale it down thinking that it will reduce the image file size. However, when you adjust the image handlers to resize an image either larger or smaller, you are NOT changing the image file size, only its image dimension on the page. In fact, Dreamweaver gives you an indication that the image has be resized by placing the height and/or width measurement in the Property panel in bold and displaying a reset button that can be used to restore the image to its original size.

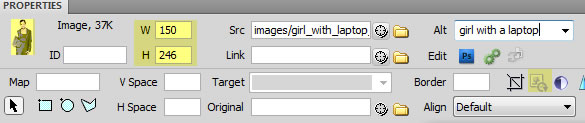
Original file size: 37K
NOTE:
Notice when an image is at its original size the resample button will be disabled and dimmed.
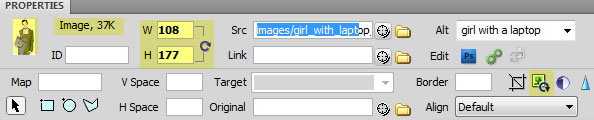
Image scale proportionally by using Shift key. File size still: 37K
NOTE: Notice when an image has been resized the resample button will be enabled.
Solution 1: Resample image
To permanently reduce the file size of an image after it has been resized smaller, you have to take an additional step and click the RESAMPLE button.
Original file size: 37K
Dreamweaver will prompt you to make sure you want to make this change. If you say "yes" the file size will be permanently changed and bold H and W measurements will revert back to normal and the reset button with disappear.

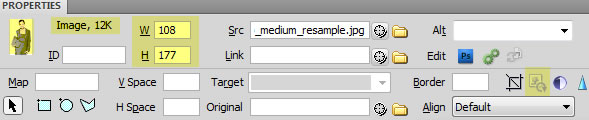
Image file size after resampling file size is 12K.
Solution 2: Crop image
Another way to reduce the file size of an image is to "crop" it. When an image is cropped, you are in essence "throwing away" pixels and hence making the file size smaller.
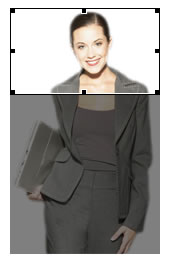
Original image before cropping:
37K

Cropped image: 6K
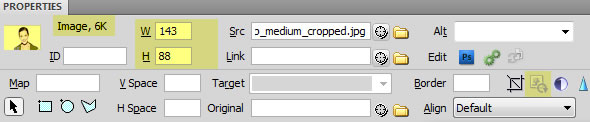
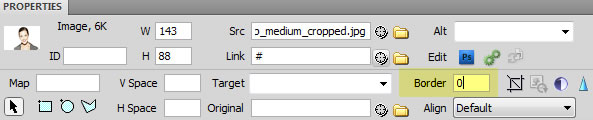
Problem: Image has a border around it
If you make an image a link, by default, it will have border around it.
Image Link with blue border
Solution: To suppress the border, you have two options:
- You can insert a zero in the Border text field in the Property panel:
- Create a CSS rule to remove the border: a img { border:none; }
Problem: Image is inline with text
Because the <img> tag in an inline element, it will sit "inline" with the text on the page by default.
Notice how the image is inline with the text on a single line.
Also the text wrap beneath the image as well. We can resolve this by create a CSS rule that will cause the
text wrap along side of the image.
The CSS code would read: img { float: left; }
Solution: Float image
When you float an image, any text will wrap or other elements will float next to it if there is enough space. If you float an image to the left, the text will wrap right or other elements will float right if there is enough space. If you float an image right, the text will wrap left and other elements will float right if there is enough space. You can only float left and right, not up and down.
Notice how the image now wraps around the image on the left
from the top of the image to the bottom and then beneath the
image. You can also add additional padding properties to
"push" the text off the edge and the bottom of the image. The
CSS rule for floating left could look like this:
{ img float:left padding-right:10px; padding-bottom:10px; }
Problem: Need a thick border or frame around image.
Solution: Add CSS properties:
.customborder { border: 2px solid blue; padding:10px; background-color:#F99; }
Problem: Need to have multiple link on a single image
By default, a single image can only have one link attached to it.
Solution: Add hotspots on a single image to make an image map
Once you select an image, you can use the drawing tools (Rectangle, Oval and Polygon) in the Property panel to "draw" hotspots that ask as links to other pages. After a hotspot is drawn, you can use the pointer tool to move the hotspot.
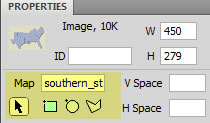
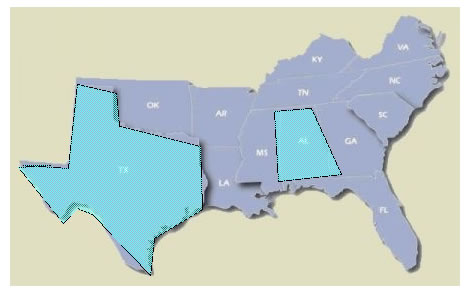
NOTE: Only TX and AL have hotspots on them.
Background images
Background images; however, does not use the HTML <img> tag to embedded images in a page instead it uses CSS and can be placed in the "background" of many container tags. It uses the following CSS syntax:
body { background:url(images/bg_pattern.jpg; }
By default, the following CSS with repeat the background image both horizontally and vertically. The other options are horizontal (repeat-x), vertical (repeat-y) and none (repeat-none).
Body Gradient
A common practice is to have a vertical gradient at the top of the page by creating a narrow graphics and repeating it horizontally:
body {background: white url(body_gradient.jpg) repeat-x; }
However, since it is not good to have to graphic extend all the way down the page, it is best to include a color (i.e., white) so the gradient can "fade" into it.
Add Image to Header
A common practice for the header is to include a background element into it with a no-repeat property.
#header { width: 814px; height:100px; background:url(images/logo.gif) no-repeat; }
Adding image to Heading tag
Most developers/designers use the heading tag <h1>, <h2>, etc. mainly for headings. You can place a bullet graphic in a heading tag to style it.
#custom_heading h1 {
padding:0;
margin: 0px;
}
#custom_heading {
background: #FF0 url(images/games.jpg) no-repeat left center;
border: 2px solid blue;
padding: 0px 0px 0px 60px;
margin: 0px;
display: block;
width: 600px;
}
<h1> tag with background image, color & border