HOW TO CREATE A LIGHTBOX USING IMAGES
Download shadowbox-3.0.3.zip (This is the version as of the writing of this tutorial.)
OBJECTIVE: A basic lightbox can be created by using a javascript class library downloaded from the web and then added to a given page.
DOWNLOAD LIGHTBOX AND ADD JAVASCRIPT LIBRARY RESOURCES
- Download lightbox resources from internet and read information regarding it. In this case, we are using the shadowbox class library
available at: http://www.shadowbox-js.com/ - Unzip file and copy the shadowbox-3.0.3 folder to web site root level. This folder include necessary files for the lightbox to work correctly.
CREATE A SERIES OF IMAGES WITH ASSOCIATED THUMBNAILS
- Create or obtain a series of images (of any web-friendly size--i.e., 320x240) and associated thumbnails (of a fixed size--i.e., 120x75, 100x100)
and place them in a folder (i.e., images/mustang) on your web site.
ADD IMAGES TO SITE PAGE
Add thumbnail images to page by any method (Insert, Drag-and-drop). In this example, paragraph tags are used so images are placed on separate lines because they are block level elements.:
CODE VIEW:
<p><img src="images/mustang/blue-thumb.jpg" width="120" height="75" alt="" /></p>
<p><img src="images/mustang/grey-thumb.jpg" width="120" height="75" alt="" /></p>
<p><img src="images/mustang/red-thumb.jpg" width="120" height="75" /></p>
DESIGN VIEW:
ALTERNATIVE:
If thumbnails are not readily available, code can be added to text instead of image:
CODE VIEW:
<p>Blue Mustang</p>
<p>Gray Mustang</p>
<p>Red Mustang</p>
DESIGN VIEW:
Blue Mustang
Gray Mustang
Red Mustang
LINK THUMBNAIL IMAGES TO LARGER IMAGES
- Link each of the thumbnail images to their corresponding larger images.
TIP: Use the point and shoot icon to link the thumbnails to their corresponding images. CAUTION: Be careful not to select the Src's Point to File instead of the Link's Point to File.
<p><a href="images/mustang/red.jpg"><img src="images/mustang/red-thumb.jpg" alt="Red Mustang" width="120" height="75" /></a></p>
<p><a href="images/mustang/grey.jpg" title="Gray Mustang"><img src="images/mustang/grey-thumb.jpg" alt="Gray Mustang" width="120" height="75" /></a></p>
<p><a href="images/mustang/blue.jpg" title="Blue Mustang"><img src="images/mustang/blue-thumb.jpg" alt="Blue Mustang" width="120" height="75" /></a></p>
- Test links to see if they "open" in new windows.
TIP: To remove the borders from the images, select the image and type a zero (0) for each image. Alternatively, you can create a CSS rule to supress the borders on the images (a img {border:none;})
ADD JAVASCRIPT TO PAGE
Add the following script in between the <head> tags as separate script tags:
TIP: Instead of writing, copy and paste the code below exactly as is.
<link rel ="stylesheet" type="text/css" href="shadowbox-3.0.3/shadowbox.css">
<script type="text/javascript" src="shadowbox-3.0.3/shadowbox.js"></script>
<script type="text/javascript">Shadowbox.init();</script>
NOTES:
- The shadowbox-base.js and shadowbox.css are located in the shadowbox 3.0.3 folder in this example. These files can be moved to
any folder in the the site. However, the file references would need to be updated to point to them. - The javascript is load immediately with the Shadowbox.init() call.
Bonus: To have the light box display other type of media other than the default image format, you can include the formats INSIDE the Shadowbox.init() function:
Shadowbox.init({ language: "it", players: ["qt", "html", "flv", "swf", "iframe", "wmp"] });
The following edit will set the default language to italy and allows the shadowbox to display quicktime, html, etc.
ASSOCIATE IMAGE (or TEXT) TO LIGHTBOX
- Add code (highlighted in bold) to link them to lightbox for each image:
CODE ONLY FOR FIRST IMAGE SHOWN
SIMPLY EXAMPLE:
<p><a rel="shadowbox" href="images/mustang/red.jpg" title="Red mustang"><img src="images/mustang/red-thumb.jpg"
width="120" height="75" alt="Red"/></a></p>
ADVANCED EXAMPLE:
<p><a rel="shadowbox[MustangThumbs]; options={counterType:'skip',continuous:true,animSequence:'sync'}"
href="images/mustang/red.jpg" title="Red mustang"><img src="images/mustang/red-thumb.jpg"
width="120" height="75" alt="Red"/></a></p>
TIP: Once you have created the first image and test it in a browser, copy the same code and paste it as many times as you need (in this
case, two more times) and then change the references to the new image (i.e., all red to blue or gray, in this case).
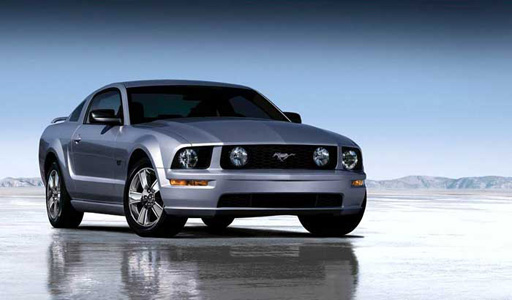
Click images below to see example of lightbox (shadowbox) in action:

For text only, add code (highlighted in bold) to link them to lightbox for each text:
CODE ONLY FOR FIRST TEXT SHOWN
SIMPLY EXAMPLE:
<p><a rel="shadowbox" href="images/mustang/red.jpg" title="Red mustang">Red Mustang</a></p>
ADVANCED EXAMPLE:
<p><a rel="shadowbox[MustangText];options={counterType:'skip',continuous:true,animSequence:'sync'}"
href="images/mustang/red.jpg" title="Red mustang">Red Mustang</a></p>
NOTE: The word MustangThumbs has been changed to MustangText so that it would not be included with the images examples.
NOTE:
Read info from internet or downloaded resource files from lightbox web site to see how to change or add parameters. For example,
notice the title tag (i.e., title="Red Mustang") that was added to the <a> tag that will show as a title for the lightbox image.
TEST LIGHTBOX
Test by previewing in a browser and clicking on image links.