USING ACTIONS IN PHOTOSHOP
SUMMARY: Actions are a sequence of one or more steps that are recorded in Photoshop and then can be played back later to repeat those step(s) on one or many files. Actions can be fully automated or they can require user interaction. You can share actions with others or download many actions from others on the web. Actions are document independent which means it is saved as a separate file and can work with any Photoshop file. Actions are not timed based so you can take your time recording steps without the fear of bloating the file like you would if you were using a screen capture program.
TIP: Anytime you see yourself doing things repeatedly or have a need to do something repeatedly, actions should come to mind as a time-saver.
IMPORTANT NOTE: Anytime you see an action name with text in parenthesis that text represents what needs to be selected or done BEFORE running the action. For example, if you see Vignette (selection) that means that you have to make a selection before running the Vignette action. Other options would be (type) which means you have to select a Type layer and (layer) means you have to have a regular layer selected.
(Optional) USING BUILT-IN DEFAULT ACTIONS
THEORY: The best way to learn about Actions and how they work is to first experiment with existing actions that comes with Photoshop.
APPLICATION: We will experiment with using some of Photoshop default actions:
- Open an image in Photoshop that you would like to experiment with.
- Press CTRL+J to make a copy of that image on another layer.
- Select Window > Actions (ALT+F9) to open the Actions panel.
NOTE: Photoshop will only show the Default Actions set listed in the Actions panel when you first install Photoshop. However, there are some built-in actions that can be loaded into this panel.
- With the Actions panel open, click on the panel's flyout menu and select one of the many built-in Action sets.
NOTE: This will include that action set in a list along with the Default set.
NOTE:
Depending on your version of Photoshop, the list may include:
- Commands
- Frames
- Images Effects
- LAB -- Black and White Techniques
- Production
- Star Trails
- Textures
- Video Actions
- Repeat step 4 to add any more action sets you want to include in the list.
- Twirl down a list of one of the set and select an action (Remember to select the right object first (selection, layer, etc.) if necessary.) and then click the Play selection button.
- Go to the History panel if necessary to restart to file
- Experiment with the other actions.
TIP: Once you create an action, you can do a series of undos (CTRL+ALT+Z) to see what operations were performed in that action. You can also twirl the action's steps down in the Actions panel to see the steps that were used.
NOTE: There are other commands in the Actions flyout menu that you can use as well (Clear, Reset, Replace, etc.).
NOTE: The Save Actions... command is particularly useful to save your actions on a CD so that you can reload them if you upgrade or re-install Photoshop or if you would like to share them with others. Actions can only be saved in sets. It is best to save the action set in the .... Actions/Presets folder so that they can appear at the bottom of the Action panel flyout's menu.
NOTE: You can use the build-in actions and customize them to meet your particular need.
(Optional) LOADING EXISTING ACTIONS FROM EXTERNAL SOURCE
THEORY: Another way to learn about actions is to load existing actions from other sources and experiment with them. Actions will have a *.atn extension.
APPLICATION: Below is a list of resources that you can experiment with:
- To load actions from an external source, select the Actions panel menu and choose Load Actions... from the panel flyout menu.
- In the Load dialog box, navigate to where the actions are (*.atn) and the press the Load button.
- Use the same procedures you used for the built-in actions to experiment with them.
PLANNING FOR AN ACTION
THEORY: "Plan the work and then work the plan" is an adage that will serve you well when you first think about creating an action. There are certain operations that actions can not perform. Knowing these operations in advance will help you better create actions. However, while actions may not perform some operations, there are workarounds that will assist you in getting your desired results. Typically, you can record steps that involve specific values (i.e., dialog box, transformation, etc.). You can also record freeform selections (Lasso, Ellipse, etc.).
APPLICATION: There are certain operations that you can not record. We will learn solutions to these operations to make the action behave the way we would like them to work.
AVOID SPECIFIC MEASUREMENT AND SELECTION:
- PROBLEM: If you create a selection of a specific size while recording, that size may not be applicable to other files.
SOLUTION: Record the Select > All and then the Select > Transform in your action. Then hold down the ALT key to adjust the selection from its center and press the ENTER key to commit the transformation. Complete the action and then add a modal control to the Transform Selection step so that the user will be prompted to adjust the selection based on the image. Then press Enter to complete the selection as you normally would do and then complete the action.
- PROBLEM: If you record an action that include the Image Size or Canvas Size, the user will be prompted to enter a specific measurement. The images may not be all of the same size.
SOLUTION: Use a percentage instead of a fixed unit of measurement (i.e., pixels).
AVOID CERTAIN MENUCOMMANDS OR OTHER SPECIALIZED TOOLS (i.e., BITMAP, VECTOR AND RETOUCHNING TOOLS)
- PROBLEM: You can not record certain tools that you have to use the MOUSE to perform a task:
- Retouching (Blur/Sharpen/Smude, Clone/Pattern Stamp, Dodge/Burn, Erase/Erase Background, Healing/Patch/Color Replacement
- Painting (Paint/History/Art brush)
- Selection (Path Selection, Direct Selection)
- Drawing (Pen and Pencil)
- Zoom
- Window and View menus
SOLUTION: While you can not record with these tools, you can still perform most of them manually as you record. For instance, you can stroke a path with a Paintbrush option instead of using the Paintbrush tool itself.
SOLUTION:
You can add menu items by choosing the Inset Menu Item... command from the Action panel's flyout menu when a command was not added or needed to be added to an action. Choose a command you want to add. You can choose commands from the menu bar, or a panel's flyout menu but not a pop-up menus in panels. NOTE: The command will not be executed until the action is played and no value will be recorded. Commands that display a dialog box will pause the action for user's input. Once the user press OK, the action continues. Pressing Cancel will abort the action at a specific step and will need to be played again.
SOLUTION: Choose Insert Stop from the Actions panel's flyout menu and give the user instruction on what they need to do (paint, draw, retouch) at a point in your action where you want these operations to occur. Make sure to check the Allow Continue checkbox. The major reason that you may want to uncheck the Allow Continue checkbox is if it is placed at the end of an action -- there would be no need to continue the action.
TIP: The Insert Menu... can by used also to open a dialog box at its default values instead of the recorded values.
NOTE: You can not use the View and Window menus.
AVOID MODAL TOOLS
- PROBLEM: Some tools require to press the ENTER key to commit the changes. A good example of this tool is the Transformation tool.
SOLUTION: When recording actions that will be performed on images of different sizes of dimensions, change the ruler units to percent before recording the action so that the modal commands plays back in the same general area for each image. (Check out pg 5 of Photoshop Productivity Toolkit)
AVOID ERRORS:
- PROBLEM: If you select a layer while recording, when you run the action the action will be "looking for" that specific layer by name (Layer 1).
SOLUTION: Use keyboard shortcuts or don't include selecting layers in the action instead activate the layer BEFORE running the action. Below is a list of shortcuts:
- To activate the next layer UP, press ALT and the right bracket key ( ] )
- To activate the next layer DOWN, press the ALT and the left bracket key ( [ )
- To activate the FIRST layer, press the ALT and the period key ( . )
- To activate the LAST layer, press the ALT and the comma key ( , )
- PROBLEM: If you use a wrong mode, you will be given an error that a command is not available. For example, some filters do not work in Grayscale mode.
SOLUTION: Add a Conditional Mode step to the top of your action. It is located under the File > Automate > Conditional Mode Change...
CAUTION: Photoshop may not recognize some keyboard shortcuts across Operating Systems. To get around this problem, if you intend to may a cross-platform action, use menus instead.
CREATING A VERY SIMPLE ACTION
THEORY: There come a time when you will want to create your own actions. While the example that will be explained is not the most effective use of actions, it does demonstrate how to create, use and run them. In the next section, we will create a little more advance example that will build on what we have learn in this example. This procedure could have been done with just as easily with a Layer Style and it would be editable.
APPLICATION: You can use the Windows > Actions menu to open up the Actions panel to create, edit, delete or play actions.
- Create a new file.
TIP: If you are new to actions and you are using a file with an image, it is a good idea to make a copy of your original file ( Image > Duplicate) particularly if the action will destroy layers or if it performs a save operation. Alternatively, you can always start an action with the Image > Duplicate command.
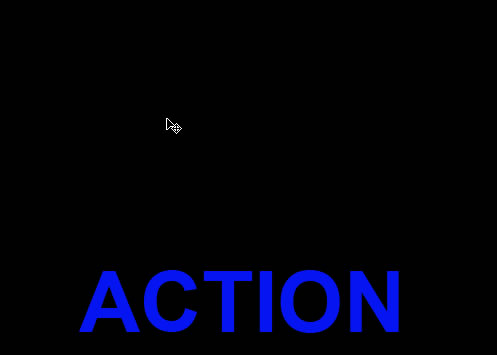
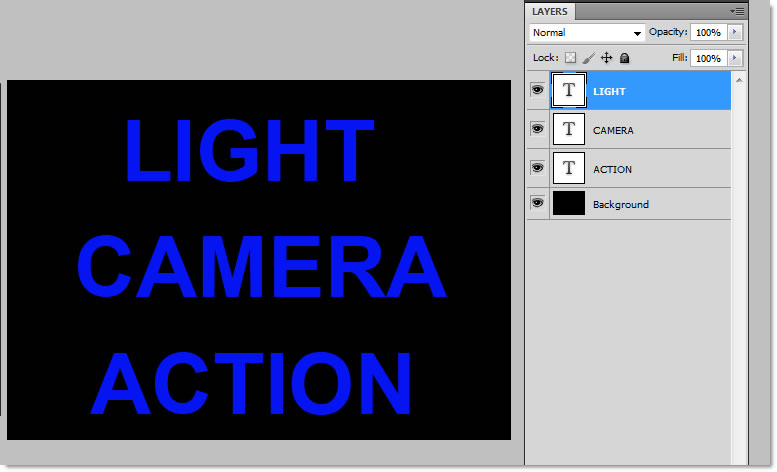
- Create a Type Layer and type some text (i.e., ACTION)), increase the size of the font and move it to the bottom center of the canvas.).
- Open up the Actions panel (Windows > Actions or ALT+F9) and click on the Create New Set icon at the bottom of the Actions panel to create a new set (folder) and give it an appropriate name (i.e., YourNameSets), an optional keyboard shortcut and then click OK.
NOTE: Alternatively, you could add the action to an existing set by clicking on it.

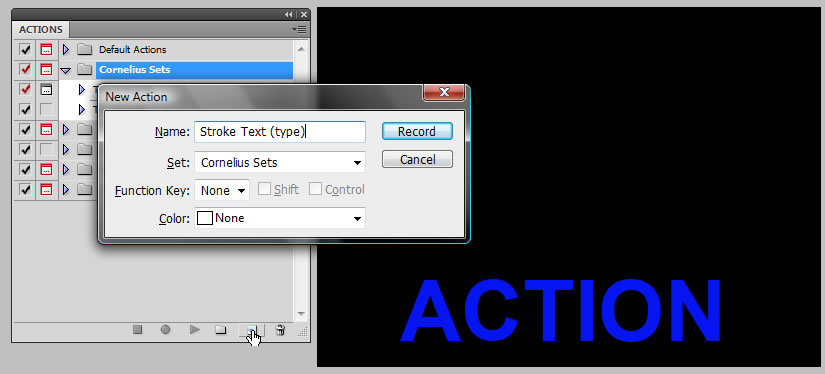
- With the set selected, click on the Create New Action icon at the bottom of the Actions panel to create a new action INSIDE of that set and give it a descriptive name and then click the Record button.
NOTE: Once you click the Record button, Photoshop will record any "recordable" steps you perform until you click the Stop button.
NOTE: Actions must be included inside a set (folder).
NOTE: If you select a set instead of an action, the Record button will be disable.
NOTE: Since we are using a Type Layer, we named our action Stroke Text (type). You can optionally choose:
a. A different set in the Set: field
b. A function or keyboard shortcut in the Function Key: fields
c. A color in the Color: field to
that will be shown if you switch from the List mode to the Button mode (See Button Mode).
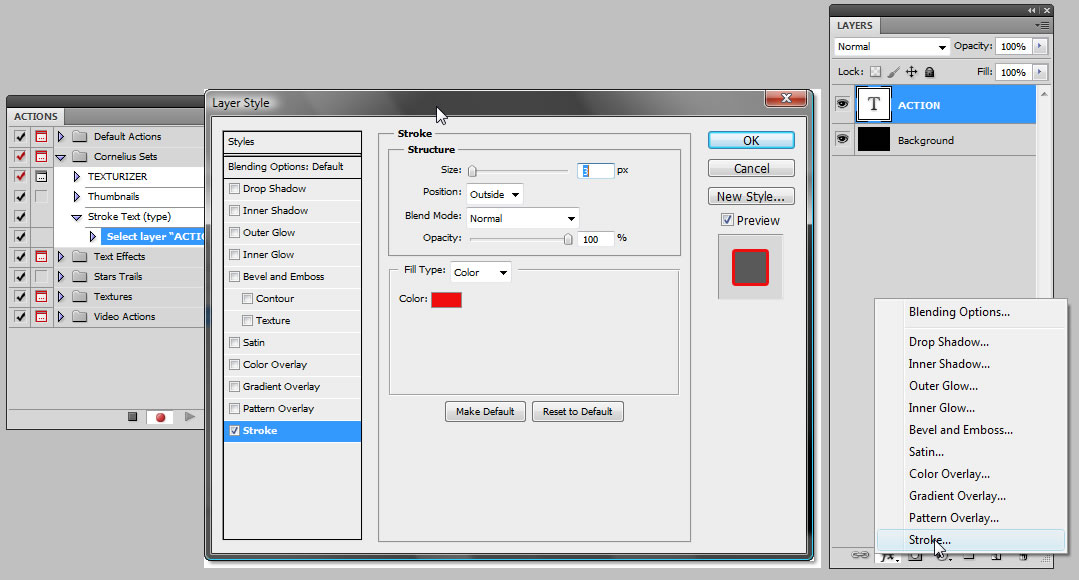
- With the type layer selected, perform any necessary operations you want to include in the action. (In our case only one step will be used. Click on the f/x icon at the bottom of the Layers panel and select the Stroke option. In the Layer Style dialog box, change the stroke Size to 3 px, change Color to red and then click the OK button.
NOTE: A step may consist of multiple tasks to complete a single "logical" step like adding a stroke as in this example.
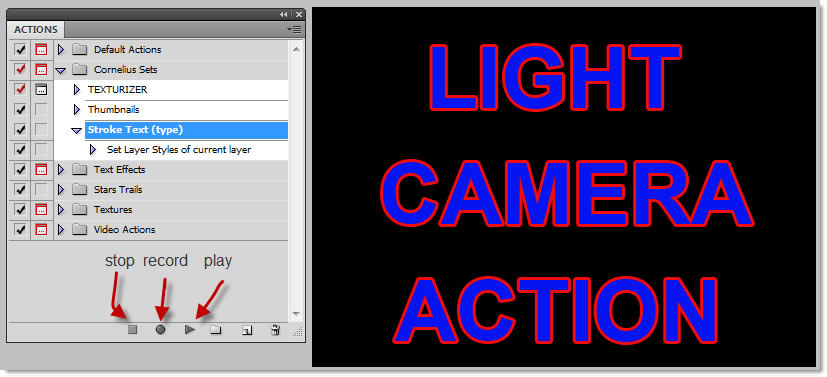
- Click the Stop Playing/Record button at the bottom of the Actions panel to stop the recording.
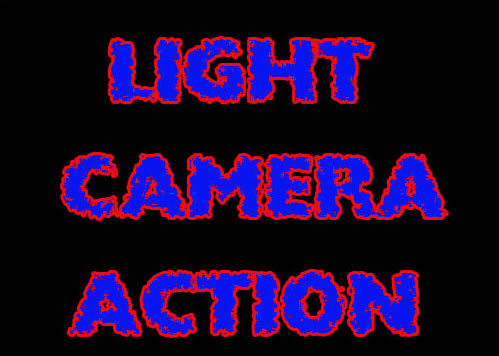
- Type some additional text with the same font and size. (In our case, we typed two additional text fields LIGHT and CAMERA) and moved them above the ACTION type field.).
- Open the Actions panel again if necessary, and select the action you just created.
CAUTION: Be careful to not select an action's step but the action itself. Otherwise, only that one step in a whole action may be played.
- With another type layer selected (i.e., LIGHT), click the Play Selection button at the bottom of the Actions Panel.
NOTE: You should see that the text inherited the steps of that action.
NOTE: If you select a set instead of an action, the Play Selection button will be disabled.
- Replay the action as necessary on other text layers (i.e., CAMERA).
NOTE: Sometimes it is best to create a draft version of an action and then fine-tune it afterward. (See EDITING ACTIONS). You don't need to record the entire action all at once. You can start and stop the recording at any time. Also, if you make a mistake recording, you don't have to start over. You can edit it later by deleting and inserting steps. (See EDITING ACTIONS).
CAUTION: Actions are saved only when you EXIT Photoshop. So it you close a file or if Photoshop crashes unexpectedly, you will lose actions that you are creating and updating unless you explicitly save it by choose Save Actions... from the Actions panel' s flyout menu.
CREATING A SIMPLE ACTION
THEORY: In this example, we will build upon the concept from the previous action to learn how to delete the effects of an action and the re-apply the action using different values.
APPLICATION: While we could create a new file, we will use the file from the previous example to learn some valuable concepts about actions.
- Open the same file from the previous section if necessary. Otherwise, create a new file and type three text fields (LIGHT, CAMERA, and ACTION) and then open the Actions panel, select the action you want (Stroke Text) and then click the Play Selection button at the bottom on the Actions panel to apply the action to all three text fields individually.
NOTE: The first concept to understand is that this action simply added a f/x effect to the text layers without destroying the text. In fact, you can retype new text on top of the existing text if you wanted to by double-clicking on the type's thumbnail and typing another word (i.e., LIGHT to DARK) and you will see that the effect is still active.
NOTE: If you create a new file, you will see that the action is file independent.
- Drag the f/x icon for the LIGHT, CAMERA, and ACTION layers in the Layers panel to the trash can icon to return the text to its original state.
NOTE: The second concept to understand is that the action applied the effect to the layer masks and not the text layers. As a result, you could delete the layer masks to return the text fields to their original state.
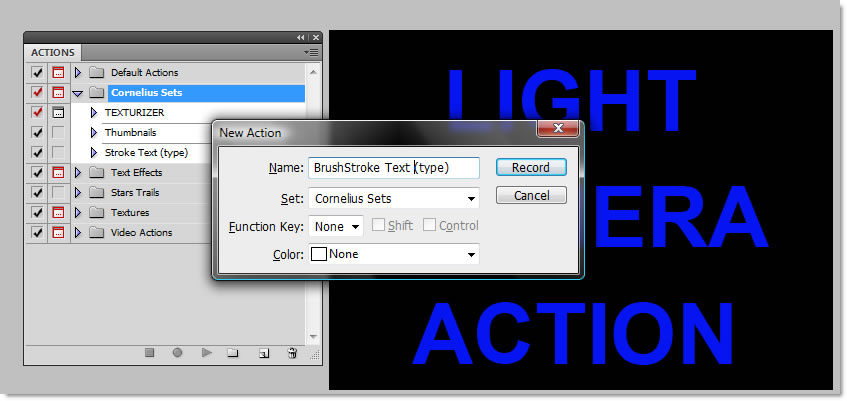
- With any type layer selected, open the Actions panel, select the YourNameSets and click the Create New Action icon at the bottom of the Actions Panel and give the action a descriptive name (i.e., BrushStroke Text (type)) and then click the Record button.
- CTRL + click on one of the text layer's thumbnail in the Layers panel to create a selection around the text.
- Choose Select > Modify > Contract and enter a value of 2 px to contract the selection and then click OK.
- Click on the Add Layer Mask icon in the Layers panel.
- (optional) Choose Filter > Convert for Smart Filters to convert the layer to a Smart Object so it can be edited later if necessary.
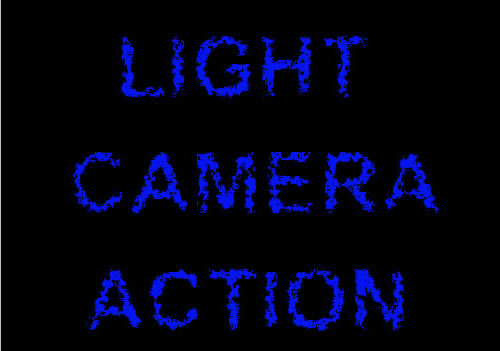
- With the layer mask still selected, apply a filter such as Filter > Brush Strokes > Spatter... and adjust the settings to your liking and then click OK.
NOTE: The third concept is that the order of the steps are very important. If the layer mask were created before the selection was made and the other steps, the action would not work correctly because the layer mask will have no changes (black and white pixels) associated with it -- is would still be solid white.
- Click the Stop playing/recording button in the Actions panel to stop the recording.
- Select the other two layers and click the Play Selection for each.
- Delete all three layer Masks (not the layers) by dragging them to the trash can icon to delete the effects from the layers and return the text fields to their original state.
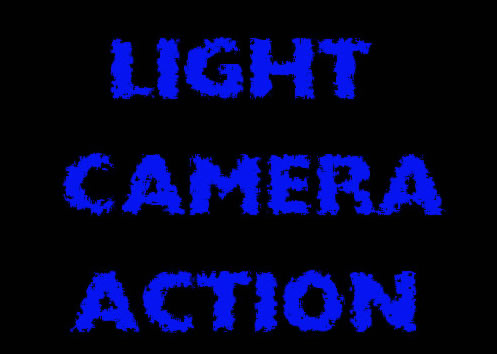
- Change the font type of each text layer to see how the effect will appear with a different font.
- Select the Brush Stroke (type) action in the Actions panel and then click the Play Selection button or use the keyboard shortcut if you defined one to run the action.
- Repeat steps 7 and 8 again but time time use a different font type.
NOTE: In this example, you are applying the actions steps to the layer mask and NOT the type layer. As a result, you an easily delete the layer mask, select a new font typeface and the re-apply the action to "experiment" with different font types.
- Apply the first action you create (Stroke Text (type)) to the same layers that you applied the (BrushStroke Text) action to.
NOTE: The fourth concept is that you can applied multiple actions to the same layer. As a result, depending on the action, you may be able to turn off the effects (Layer mask, f/x effects, adjustment layer, etc.).
CREATING AN INTERACTIVE ACTION
THEORY: While many actions can be done without user intervention. There are times when you will want to make an action interactive. There are mainly two ways to make an action interactive -- using modal control and the Insert Stop command. Using modal allows the action to force a specific dialog box so that the user of the action can enter a specific value instead of the using a default recorded value. The Insert Stop command will pause an action and display a message dialog box. The message usually contains instructions on what to do. You can insert a Stop either while you are recording or after the recording. Because the Actions panel can not record everything (See PLANNING FOR AN ACTION above), the Stop command can also be used to insert a message on what the Action panel can not do (i.e., Use Brush Tool to paint a stroke. then press the play Selection to complete the play.). The key is to not check the Allow Continue checkbox. When an operation is complete, the user will have to click the Play Selection button to continue the action. TIP: You can also use the Insert Stop command to debug your code like you would do when using a programming language to "throw" an alert box or a trace where you think the problem is.
APPLICATION: We will create an action that will prompt the user to input value and display instruction on what next to be done next to "texturize" an image.
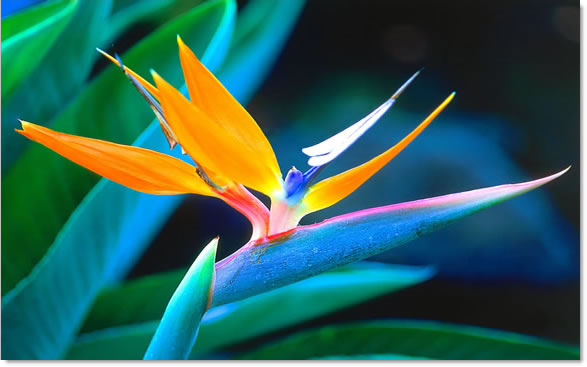
- Open an image in Photoshop that you would like to apply an interactive action to.
TIP: If you are new to actions and you are using a file with an image, it is a good idea to make a copy of your original file ( Image > Duplicate) particularly if the action will destroy layers or if it performs a save operation. Alternatively, you can always start an action with the Image > Duplicate command or duplicate the Background layer and perform the action on it.
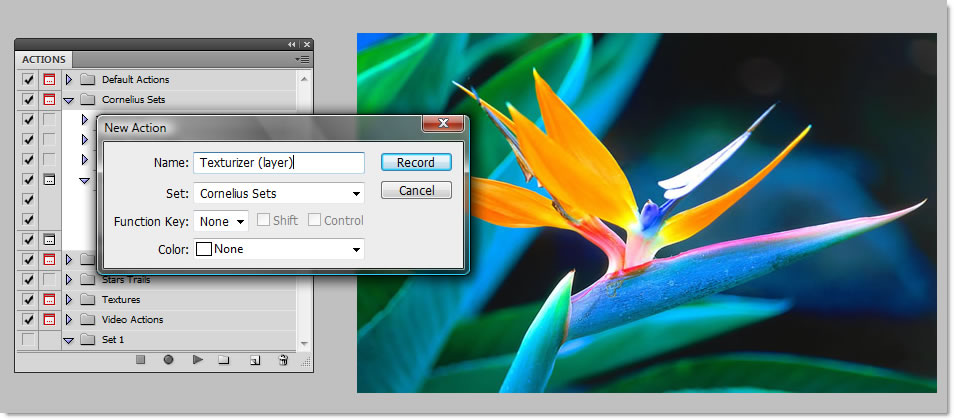
- If you have not already done so, open up the Actions panel (Windows > Actions or ALT+F9) and click on the Create New Set icon at the bottom of the Actions panel to create a new set (folder) and give it an appropriate name (i.e., YourName Sets) and then click OK.
NOTE: Alternatively, you could add the action to an existing set by clicking on it.
- With the set selected, click on the Create New Action icon at the bottom of the Actions panel to create a new action INSIDE of that set and give it a descriptive name (in our case, Texturizer (layer)), an optional keyboard shortcut and then click the Record button.
- Perform the necessary steps. In our case:
- Select a layer that you want to create an action for and copy it to another layer by pressing CTRL+J.
- (optional) Select Filter > Convert for Smart Object to convert the layer to a Smart Object.
NOTE: This will allow you to edit the filter later.
- Select Filter > Texture > Texturize... and change the options to your liking and then click OK.
- Click the Stop playing/recording button in the Actions panel.
NOTE: If you were to apply this action to a layer, it would still be non-interactive.
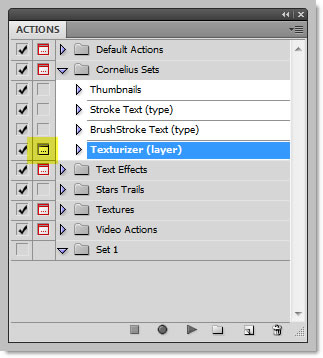
- Click on the empty square to the left of the Texturizer step in the Actions panel to turn ON the modal control.
NOTE: When the modal control is empty, the action will run without displaying any dialog box and will use the original settings applied during the initial recording.
NOTE: Now, when you play the actions, it will open the Texturizer filter dialog box to allow you to experiment with the filter before you commit it. Once you click OK, the rest of the action will play without stopping.
- Delete the layer that was was created by the action by dragging the layer to the trash can icon.
- Select a layer and then select the Texturizer (layer) action set and then click the Play Selection button in the Actions panel. You will be prompted to make changes in the filter dialog box. Make changes to your liking and then click OK.
NOTE: While this is not the most effective use of creating an interactive action, it does demonstrate how to create and use it. This procedure could have easily been done using Smart Filter and it would be editable as well.
NOTE: This action simply copy the current layer and allows the user to select their own texture. Hence, you could delete or turn off this layer and return the image to its original state.

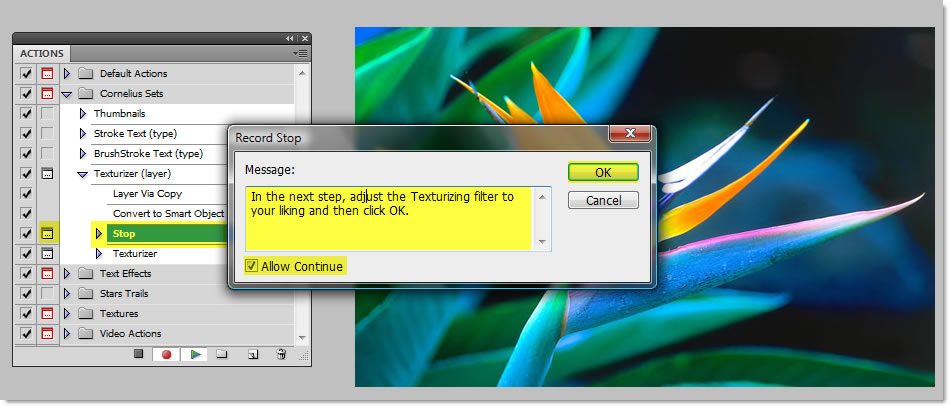
- Click on the triangle to the left of the action to expand the steps for that action (in our case, Texturizer and select the step ABOVE the step you want to insert a Insert Stop command (in our case, the Convert for Smart Object step).
- Choose Insert Stop... from the Action panel's flyout menu.
NOTE: Note that the Insert Stop command was added without the recorder being on. It can be added while recording or after recording.
- In the Record Stop dialog box, add a message. (i.e., "In the next step, adjust the Texturizing filter to your liking and then click OK."), turn ON the Allow Continue checkbox and then press OK.
NOTE: An Stop step was added after the step you selected along with a model control to the left.
- Delete the layer that was was created by the action by dragging the layer to the trash can icon.
- Select the original layer and the click the Texturizer (layer) action in the Actions panel. You will be prompted by the Stop Insert command with a message on what to do next. Click OK after reading the message. You will then be prompted to adjust the filter to your liking and then you can press OK again.
EDITING AN ACTION
THEORY: Once you create an action, you can use various techniques to edit it. Below is a list of what can be performed.
APPLICATION: These procedures are basically the same as working with Layers:
- Edit a multi-tasks step (denoted by triangle) by double-clicking on it to open up its dialog box to make changes.
NOTE: You can not edit a single task step because there is no parameter to change.
- Change the order of the steps or actions by dragging them up or down in the Actions panel.
- Duplicate an action by dragging it to the Create New Action icon or holding down the ALT key while dragging to a new location in the Actions panel.
- Delete step or an action by dragging it to the Trash can icon or selecting either the action or the step and then click on the Trash can icon. Then click the OK button in the Delete dialog box.
NOTE: To suppress the Delete dialog box, hold down the ALT key before clicking on the Trash can icon.
- Insert a step by selecting a step above where you want to insert a step and then click on the Record button, add the step and then click the OK. You can also insert some steps without turning on the recorder. For example, to add a Insert Stop... command select it from the Actions panel's flyout menu.
- Turn modal control on/off by clicking on the small menu icon in the left column of the Actions panel.
- Move an action to a Set (folder) by dragging it to a new set.
- Expand or collapse an action or step to show/hide it by clicking on the triangle.
NOTE: Most of the procedures can also be done via the Actions panel's flyout menu.
NOTE: You can also nest one action inside of another action as a step. For example, you could nest the action "Convert to CMYK" inside of a parent action. The advantage of this approach is that if you have to update the nested action (i.e., Covert to CMYK), it would get updated in any other actions that had that action included. This is akin to an include statement in web development.
- Change Action Options by selecting the Action Options from the flyout menu which is similar to the New Set dialog box with the exception that you can not change the set.
- Insert a Path by selecting the Insert Path from the flyout menu.
PLAYBACK OPTIONS
THEORY: Once an action is recorded or loaded from another source, you have a variety of playback options.
APPLICATION: Below is a list of playback options:
- To playback the WHOLE ACTION, simply click the Play Selection button.
- To playback a SINGLE STEP, select the step and then CTRL + double-click on it.
- To playback an SET OF ACTIONS, click on the first action in the set and then hold down the SHIFT key and click on the last action and then click the Play Selection button.
- To playback an action FROM A SPECIFIC STEP, click on the step and then click on the Play button. The action will play from that step to the last step in the action.
- To playback an action at DIFFERENT SPEED, select the Playback Options... from the Actions panel flyout's menu. You can select accelerated, step-by-step or pause for a specific about of seconds.
TIP: You can use the Playback Options to adjust the speed to "inspect" your action if you are having problem with it.
- To playback an action with one click, select Button Mode from the Actions panel flyout's menu. You can also playback an action by defining a keyboard shortcut when you first create the action.
- To exclude a step from running, uncheck the step in the in the Actions panel.
BATCH PROCESSING
THEORY: While using an action on a single image can be a time-saver, the real time-saver comes when you use an action in conjunction with Batch Processing. Batch Processing can apply an action to a folder or a series of folders that is full of images.
APPLICATION: We will use the Batch Processing command to process multiple images from a folder of images.
IMPORTANT NOTES:
- It is best to designate a destination folder so the the result of the batch processing don't overwrite the original images mistakenly.
- While using actions by themselves, there is little concern about opening and saving a file. However, when you use Batch Processing, two of the most important options that you need to set are the Override Action "Open" Commands and the Override Action "Save" Commands.
- If you run an action to open a document, it will always open that same document. To get around this limitation you HAVE to use the Batch Process and set the Override Action "Open" Commands to, as the name implies, override the hard-wired file. Instead you can point it to a folder.
- Likewise, the save concept holds true for the Save As. If you run an action to save a document, it will always be saved with that name. To get around this limitation you HAVE to use the Batch Process and set the Override Action "Save" Commands to, as the name implies" override the hard-wire saved file. Instead you can specify how the file is saved and named.
NOTE:
When you use the Save As dialog box, change ONLY the options you want to change and the other options will remain at the document existing settings You need to also make sure the folder you are saving to will always exist at the same location; otherwise, an error will be given.
- Select File > Automate > Batch (or choose Tools > Photoshop > Batch in Bridge). In the Batch dialog box, make the appropriate settings and then click OK. Below is a list of options that you can choose from:
- Play: What action to play
- Set -- To select the set (folder).
- Action: Select the particular action from that folder set.
- Source: Choose source folder
- Choose... -- browser to source folder
- Override Action "Open" Command
- Include All Sub folders
- Suppress File Open Options Dialogs
- Suppress Color Profile Warning
- Destination: Choose destination folder:
- None -- When the action is complete, the changed images remains open. This is useful when you or experimenting with an action or you want to see the results before committing them.
- Save and Close -- overwrite the original images so use with caution particularly if the action effects are destructive (i.e., flattens/merging layers, etc.). If the action include a Save As step, check the Override Action "Save As" Commands to avoid displaying a warning dialog box. Choosing this option will use the recorded format (i.e., jpg, png, etc.). If the Save As Command is uncheck, the user will be prompted with the Save As command for EACH image.
- Folder -- save to another folder. You also have the option to do a batch rename with multiple options.
- Choose... -- browse to destination folder
- Override Acton "Save As" Commands
- File Naming -- how to name file
- Errors: What to do with errors
- Stop for Errors -- stop Batch process
- Log Errors to File -- continue the Batch process but save errors to a file.
- Save As... -- Save errors to text file when you select Log Errors to File. Otherwise, this button will be dimmed and disabled.
Batch Processing Example (Creating thumbnails)
CREATING THE ACTION:
- Open the Action Panel (Windows > Actions or ALT+F9).
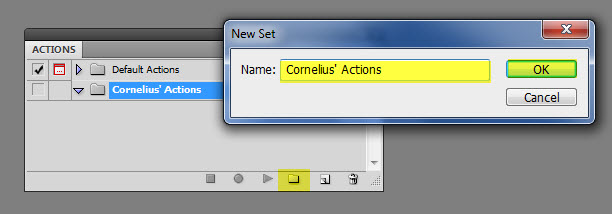
- Use an existing set by clicking on an existing set (folder) or create a new action set by clicking on the Create New Set (folder) icon at the bottom of the panel and give it a name (i.e., YourName Actions) and then click OK.
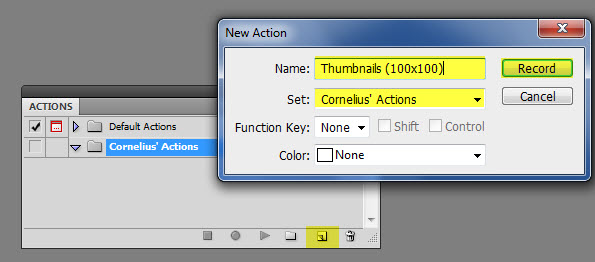
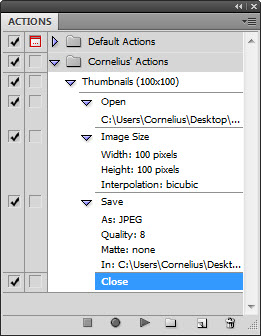
- With the appropriate set (folder) selected, click on the Create New Action icon at the bottom of the panel and give the Action a descriptive name (i.e., Thumbnails (100x100)) and any other options (Function Key, Color) necessary and then click the Record button.
CAUTION: Any step you do after you press the Record button may be recorded until after you click the Stop Playing/Record button.
- Open any image that you would like to. (It is only needed to record an initial file).
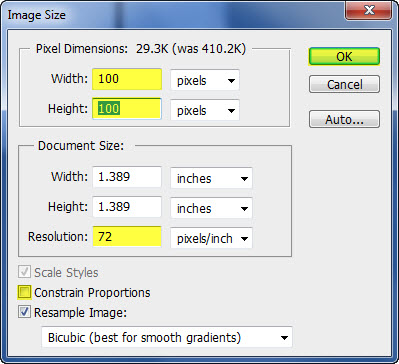
- Select Image > Image Size... and ensure the Resolution is set to 72 ppi and change both the Width and Height to the size you need (i.e., 100 W x 100 H) and then click OK.
NOTE: You may have to deselect the Constrain Proportions if you need to resize the image.
- Select File > Save As... and save the image as a jpg file somewhere on your hard drive by clicking OK in the JPEG Options dialog box. It doesn't matter where you save the file as we will change the path in the Batch Processing dialog box.
- Select File > Close and DON'T SAVE THE FILE.
NOTE: We use the previous procedures to "capture" the steps only. We now need to run a batch process on some images in a folder.
- Select Stop Playing/Recording icon at the bottom of the Actions panel.
NOTE: Your Actions should look similar to the following screenshot when the steps are expanded:
USING THE BATCH PROCESS:
- Select File > Automate > Batch (or choose Tools > Photoshop > Batch in Bridge).
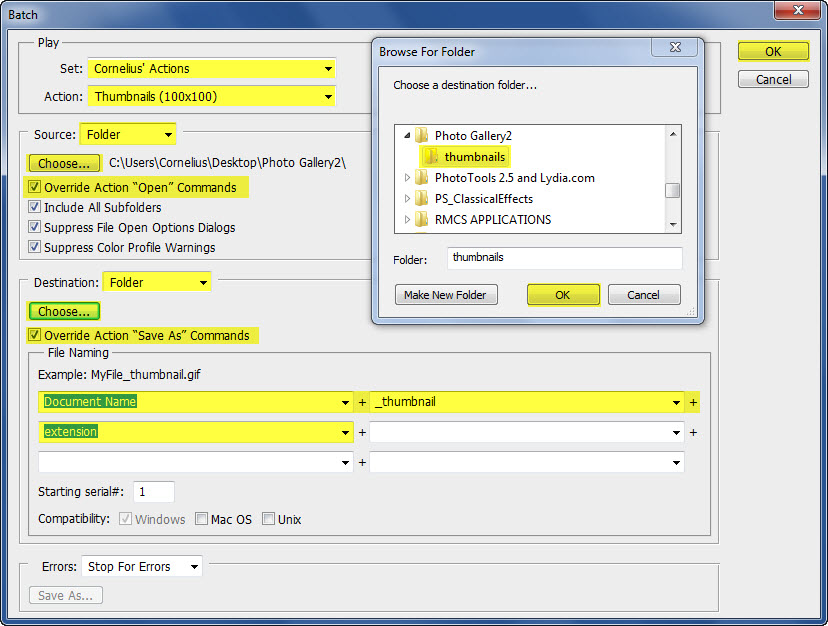
- In the Batch dialog box, select the following:
- Play section: Select Set (Cornelius Actions) and Action (Thumbnails100x100)
- Source section: Select the Choose... button and navigate to the folder where all of the images are that you would like to convert to thumbnails. It is very IMPORTANT that you select the the Override Action "Open" Commands.
- Destination section: Select the Choose... button and navigate to the folder where you would like all of the thumbnails to be save or create a new folder. It is very IMPORTANT that you select the the Override Action "Close" Commands.
- In the File Naming Section, add the world "_thumbnail" in the second field and the word "extension" to the third field so that it appears at the end of each image name (i.e., myphoto_thumbnail.jpg).
- (optional) Errors section: Log errors To File and the select the Save As... button to save error to a text file.
- Click OK to run the Batch Process.
NOTE: You should see the screen flashing as it runs the Action, this is normal.
NOTE: You should see the thumbnails in the folder that you specified at 100x100. TIP: If you do not see the Dimensions as a column in the File Explorer, right-click on a column heading and select the More... option. In the Choose Details dialog box that appears, select the Dimensions checkbox and then click OK.
CREATING DROPLETS
THEORY: A droplets is a mini-application that is similar to Batch Processing except it does not have a destination folder. The reason for this that you can drag-and-drop an image or a folder of images to the Droplet icon to execute the action.
TIP: Save the droplet to your desktop for quick access/
APPLICATION: We will create a droplet on this desktop so we can batch process images.
- Select File > Automate > Create Droplet and choose the appropiate settings similar to Batch processing (except for Destination folder).
- Drag-and-drop an image or a folder to the droplet.
NOTE: Photoshop will open and process the action.
IMPORTANT NOTE: If you get an error stating that the droplet can not communicate with Photoshop. You have two options:
- You need adminstrative right to use the Droplet.
- Open the Control Panel and select User Account and then click on the link for Changing User Account Settings (UAC) and set the level to the last setting and click OK. You will need to restart your computer for the settings to take effect. Drag and drop a file or folder on the Droplet again and it should work correctly. Don't forget to reset the UAC setting back to its original settings after you use the Droplets.
(optional) USING BUTTON MODE
THEORY: The def al ut mode is the List. However, you can also switch to the Button Mode. In this mode, all the actions are displayed as "buttons" that you can assign a color to. You can only run actions by clicking on a button but not edit them in this mode.
APLICATION:
(optional) USING FLASH PANEL (CS4 or higher)
THEORY:
APLICATION: