GOOGLE MAP IN A FLASH APP
The Google Maps API for Flash is used to add an interactive Google Maps to a website instead of using the JavaScript Maps API. The advantage is that you can add additional Flash content to the map.
Download Goolge Maps API, API Key and Documentation
Go to http://code.google.com/apis/maps/documentation/flash and in the How do I start? section:
- Sign up for a Google Maps API Key to adhere to the licensing agreement (If client's url is not available, use http://localhost)
- Download the Google Maps API for Flash SDK and unzip it to your desktop (or anywhere you prefer)
- Read the Developer's Guide for how to use the Google Maps APIs
- Read the API Reference on what the Google Maps API can do
-
Install Google Maps Component
- Create a new folder called Google inside of:
- (Windows) C:\Program Files\Adobe\Adobe Flash CS4\language\Configuration\Components
- (Mac OS X) Macintosh HD/Applications/Adobe Flash CS3/Configuration/Components
- or create a Components folder if one does not exist.
NOTE: You may need to change your file permissions to see these directories.
- NOTE: There is a separate directory for each languages (i.e., en) Use the correct language you need.
- Unzip the downloaded file and copy the Google Map component (map_1_9a.swc) from the sdk/lib folder and paste it into the newly created Google folder so that it can be available inside the Components panel in Flash.
- Launch Flash, and open both the Component and the Library panel at the same time. Drag and drop the GoogleMapLibrary from the Component panel to the Library panel so that Flash can have access to all of the Google Map API Interface Library of public classes. ALTERNATIVE: You could drag the component to the directly to the stage and it will be placed in the library. Then delete it from the stage.
Add Code to Flash
- Cut and paste the following code in the Action panel in frame 1 layer 1 of the timeline. You can delete the comments if you want to.
import com.google.maps.*;
import com.google.maps.overlays.*;
import com.google.maps.controls.*;
var map:Map = new Map();
map.key = "your_api_key";
map.setSize(new Point(stage.stageWidth, stage.stageHeight));
this.addChild(map);
- If you have not already done so, copy and paste the API key to replace the MY_API_KEY in the code.
- RESULT TEST POINT: Preview (CTRL+Enter) the current code. You should see a basic zoomed out world map without any controls on it. All you can currently do is click and drag to move the world map around.
- Cut and paste the following code BELOW the existing code to add the Zoom and Map Type controls.
map.addEventListener(MapEvent.MAP_READY, onMapReady);
function onMapReady(eventObject:MapEvent):void
{
map.addControl(new ZoomControl());
map.addControl(new MapTypeControl());
}
NOTE: Map controls include:
- PositionControl - a pan control that appear in the top-left corner by default.
- ZoomControl - a zoom control slider.
- MapTypeControl - buttons that let views toggle between map types
- ScaleControl - a scale control that is used to indicate resolution and zoom level.
- OverviewMapControl - a collapsible overview map that appears in screen corner.
NOTE: The function passes an eventObject called MapEvent which is ignored in this case.
ALTERNATIVE: You may also initialize a map by intercepting and handling the MapEvent.MAP_PREINITIALIZE event instead, see MapOptions.
- RESULT TEST POINT: Preview (CTRL+Enter) the current code. You should see the map now with the Zoom and Map Type controls.
- Browse to Google Map (http://maps.google.com/maps) to search for the address you want to show and center it on the screen.
- Get the Latitude and Longitude by cutting and pasting the following javascript in the browser's address bar and press the ENTER key:
javascript:void(prompt( ' ' , gApplication.getMap().getCenter())); Then COPY the resulting latitude and Longitude values (WITHOUT THE PARENTHESIS) to the clipboard. Use can also do this directly in Flash (GO TO GOOGLE API TO FIND OUT HOW)
- In the onMapReady eventHandler copy and paste following code line that is in bold at the END of the code block but INSIDE the curly braces to set the location.
NOTE: Along with the location, notice the zoom level and map type are included as parameters in the setCenter function.
function onMapReady(eventObject:Event):void
{
map.addControl(new ZoomControl());
map.addControl(new MapTypeControl());
map.setCenter(new LatLng(37.77114, -122.40159), 18, MapType.NORMAL_MAP_TYPE);
}
- RESULT TEST POINT: Preview (CTRL+Enter) the current code. You should see the location centered on screen.
NOTE: Zoom levels are between 0 (lowest) and 19 (highest).
NOTE: Map types include:
- NORMAL_MAP_TYPE - shows default view
- SATELLITE_MAP_TYPE - shows Google Earth satellite images
- HYBRID_MAP_TYPE - shows a "hybrid" of normal and satellite views
- PHYSICAL_MAP_TYPE - shows a physical relief map of the Earth surface
- DEFAULT_MAP_TYPES - shows an array of all four types
Exporting SWF File
Output Flash movie as you normally would, but ensure that Local playback security: is set to Access network only so that the Flash player can communicate with Google's servers to retrieve the Maps API library.
Hosting Your SWF File in a Web Page
Normally, the API Key is compiled with the Google Maps Flash SWF file and can be used as a standalone application. However, it is best practice to use FlashVars instead as an alternative. If values are specified as FlashVars, they will override values contained within the SWF file. It is important to note that the API key must match the domain where the SWF file is hosted–not the domain where the HTML file may be hosted. Below is a snippet of code to include the FlashVars in the object and embed tags:
<object> ....
<param name=flashVars" value="key=your_api_key">
<embed ...
flashVars="key=your_api_key"
</embed.
</object>
BONUS: Add a custom marker
- Create a small marker (about 100W x 75H) with a transparent background and a pointer using Photoshop or another image editing program that will represent the location on the Google Map.

- Import the newly created marker and convert it to a movie clip (F8).
- In the Convert to Symbol dialog box select the movie clip as the Type and give it a name of marker.
- Ensure that the Advanced option is selected and click on the Export for ActionScript checkbox and ensure it has a class name of marker as well and then click OK.
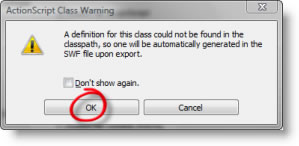
- In the ActionScript Class Warning dialog box, Flash will prompt you to convert the movie clip to a class, click OK to make the movie clip available as an object in the ActionScript panel when writing code.
- Double-click on the movie clip in the Library Panel and move the graphic so that the registration point is the tip of marker point (See above)
NOTE: You are not limited by a static movie, you could create any type of movie that include animation, video, etc. You could also use other types of overlays (i.e., lines, shapes, etc.) to make a more interactive map.
- In the onMapReady eventHandler copy and paste the following lines of code that is in bold at the END of the code block but INSIDE the curly braces to replace the default marker with a custom marker.
function onMapReady(eventObject:Event):void
{
map.addControl(new ZoomControl());
map.addControl(new MapTypeControl());
map.setCenter(new LatLng(37.77114, -122.40159), 18, MapType.SATELLITE_MAP_TYPE);
var my_marker:Marker = new Marker(new LatLng(37.77114, -122.40159) , new MarkerOptions( {icon:new marker()}));
map.addOverlay(my_marker)
}
- Replace the LatLng parameter with the value you previously used.
- RESULT TEST POINT: Preview (CTRL+Enter) the current code. You should see the location centered on screen with your custom marker.
NOTE: Review the Developer Guide and API References for additional functionalities (i.e, get direction between two locations, etc.)